CLARENDON WAY
Stage 1: Winchester to Middle Winterslow
Friday, September 21, 2012

(1) Winchester Cathedral

(2) Tower of St Maurice's Church, Winchester
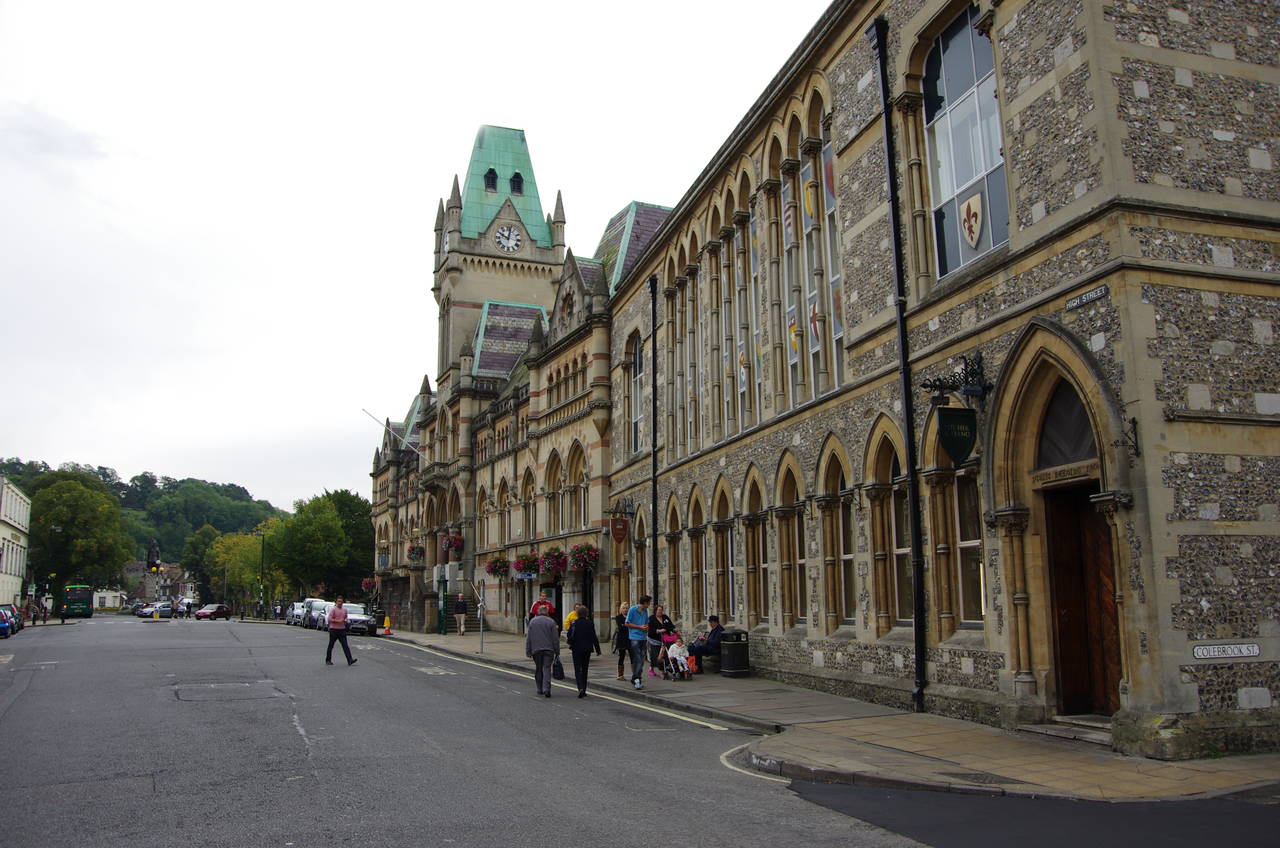
(3) Guildhall, Winchester

(4) King Alfred Statue, Winchester
As I was staying in an old pub in the centre of Salisbury, just around the corner from the end of the walk, my day began with a long train ride to get to the start of the walk in Winchester. As there is no direct rail line between the two cities, I had to travel up to Basingstoke and change trains there to get to Winchester. That process took almost two hours and successfully banished any thoughts I had about trying to complete the walk in one day.
The Clarendon Way starts in front of the west side of Winchester Cathedral (picture 1) following a path north across the cathedral close to pass through the archway of the medieval tower that is all that remains of St Maurice's Church (picture 2), the rest of which was demolished in 1842. This leads into a small covered square, where there are often a few market stalls, then out to Winchester's High Street, where the route turns right to pass by the city's magnificent medieval Guildhall (picture 3). In the middle of the High Street some distance ahead stands a statue of the Saxon King Alfred the Great, who ruled the kingdom of Wessex from 871 to 899AD (picture 4). The statue was created in 1899 to celebrate to 1,000th anniversary of King Alfred's death.

(5) The Bishop on the Bridge, Winchester

(6) Town Mill, Winchester
(7) River Itchen, Winchester

(8) Swans on the River Itchen
The Clarendon Way follows the High Street past the statue, turning right between the Bishop on the Bridge pub (picture 5) and the Town Bridge, which spans the River Itchen. Across the road from this turning, the Town Mill spans the river just upstream of the bridge (picture 6). The historic mill, which dates from 1743, is operated by the National Trust and is an interesting place to visit, as I had done a few months earlier.
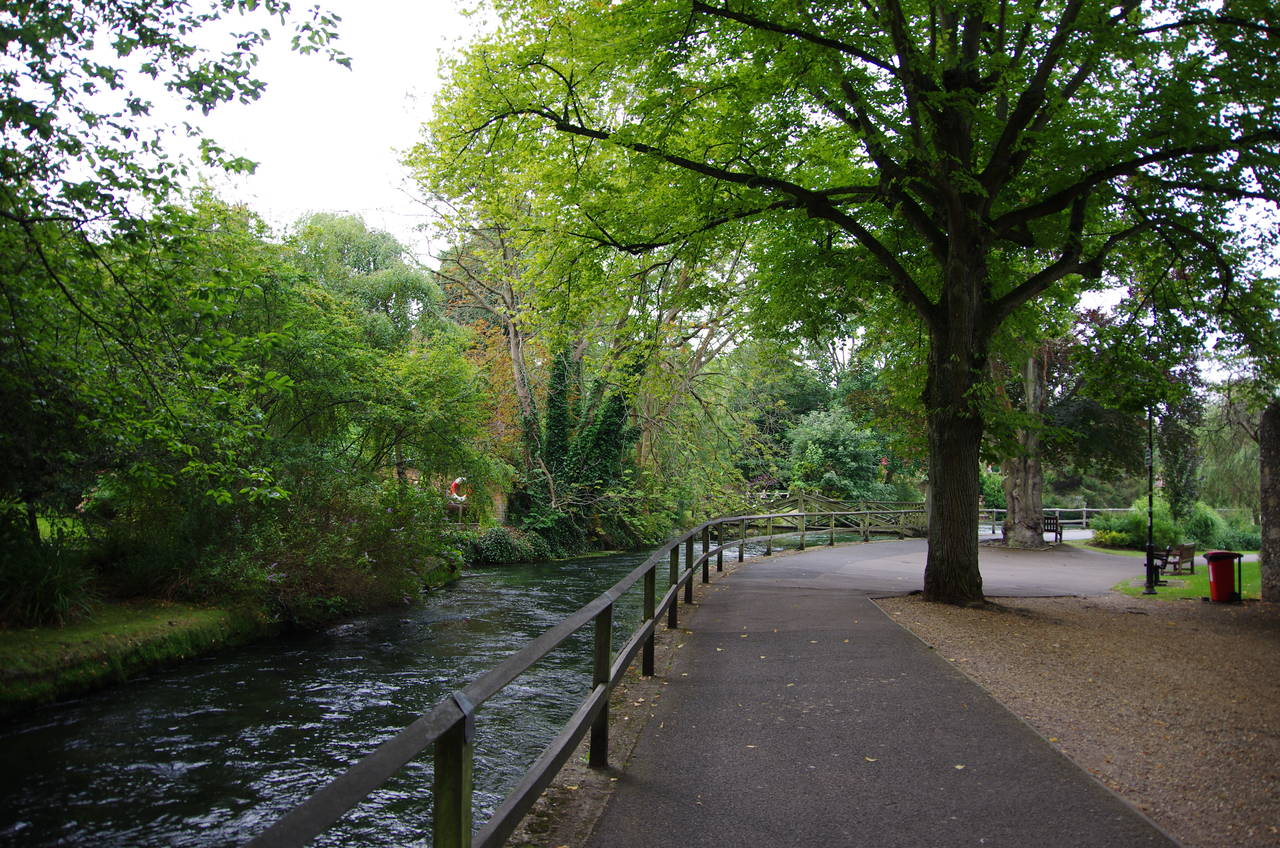
The Way follows a path called The Weirs between the fast-flowing river (picture 7) and the medieval stone city wall. When the two diverge, the route stays close to the wall, which here marks the perimeter of the grounds of the ruined Wolvesey Palace, another interesting place to spend an hour or two exploring. Before long, the wall turns to the right and shortly reaches the palace entrance. Opposite the entrance, the Way turns left into College Walk and at the far end of that turns right into a narrow carpark owned by Winchester College.
At the far end of the carpark, the Way turns left onto a footpath that runs across watermeadows beside a side-channel of the River Itchen where several families of swans have made their home (picture 8).

(9) Old Mill

(10) St Cross
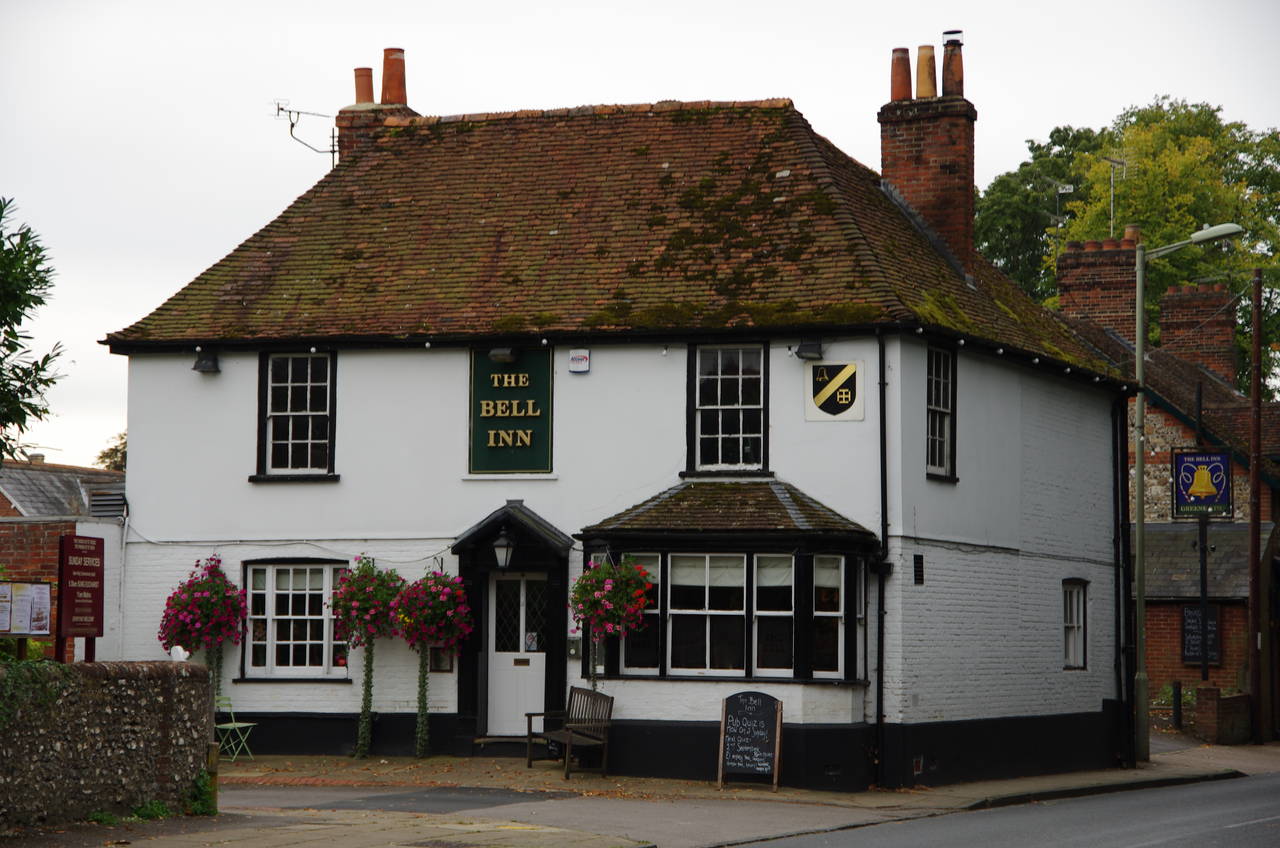
(11) The Bell Inn, St Cross

(12) South Winchester Golf Club
After about 700 metres the well-trodden gravel path crosses Garnier Road by the Old Mill (picture 9), continuing ahead for another 500 metres to reach a wooden signpost at the corner of the perimeter wall of the Hospital of St Cross and the Almshouses of Noble Poverty. Turning right, the path follows the wall past the main gate, where one can see some of the hospital's buildings (picture 10). Founded in 1132, these are England's oldest almshouses. For a small fee the Porter will provide visitors with the Wayfarer's Dole, a small drink of beer and a piece of bread, a tradition that goes back to medieval times.
At the end of the wall, by the B3335 St Cross Road, the Way passes The Bell Inn (picture 11), alas still closed at this time of the morning, before crossing the road and bearing right into Mead Road. At the top of Mead Road, the route crosses a footbridge over the railway line that runs between Winchester and the south coast. On the other side of the tracks the Way joins a narrow earth path that runs along the middle of a strip of trees and scrub for about a kilometre to the B3090 Badger Farm Road. Just before the road, a post that is well-hidden in the foliage beside the path displays a waymarker disc indicating that the route goes to the right for about 40 metres to find a footbridge over the road.
A path ahead on the other side of the bridge takes the path along field boundaries to a quiet residential street called Olivers Battery Gardens. Crossing it and continuing ahead on a narrow enclosed path to reach Texas Drive by a carpark in the corner of a large open space known as Oliver's Battery, where Cromwell's forces camped in 1645 while laying seige to Winchester during the English Civil War.
From here, I found the next part of the route quite hard to follow, partly due to missing a waymarker sticker on a bollard (though I managed to photograph it) and partly because the routes on the County Council's brochure and the Ordnance Survey don't match. Unfortunately, I managed to walk about 500 metres along the edge of Oliver's Battery in search of the next waymarker before convincing myself that I'd made a wrong turn and heading back to the carpark.
The signposted route turns right by the carpark, following Texas Drive for about 30 metres before joining a tarmac footpath ahead to the corner of Compton Way, which goes right, and South View Road, which goes left. The latter is followed ahead to a T-junction where the route marked on the Ordnance Survey turns right on Oliver's Battery Road South, but the signposted route turns left for 20 metres then crosses over into Momford Road. Here I preferred the signposted route, Following Momford Road to its end, where the Way crosses over Old Kennels Lane and takes a path between houses and onto the South Winchester Golf Course.
The Way crosses the golf course (picture 12) by following a path marked with blue posts. After around 500 metres, the path emerges from the golf course beside the A3090 at a bus stop on the edge of Pitt Village.

(13) Clarendon Way

(14) Lanham Lane

(15) Sarum Road
(16) Crab Wood
Across the road, the Clarendon Way follows a field edge path that climbs gently uphill past a piggery to reach Sarum Road, which follows the course of part of a Roman Road. This is the first of several encounters the Clarendon Way has with the old Roman Road on the way to Salisbury, and incidentally, Sarum is the medieval name for Salisbury.
The route turns right along the tree-lined road for a little over 100 metres before turning left on another quiet road called Clarendon Way. This road passes by another golf course (picture 13), the gates of Clarendon Lodge and a scout campsite before bending left and merging with Lanham Lane (picture 14). This is followed for about 1.2 kilometres as it heads first through a narrow strip of woods between fields and then along the edge of the Crab Wood Nature Reserve to rejoin Sarum Road in the middle of a cluster of farm houses.
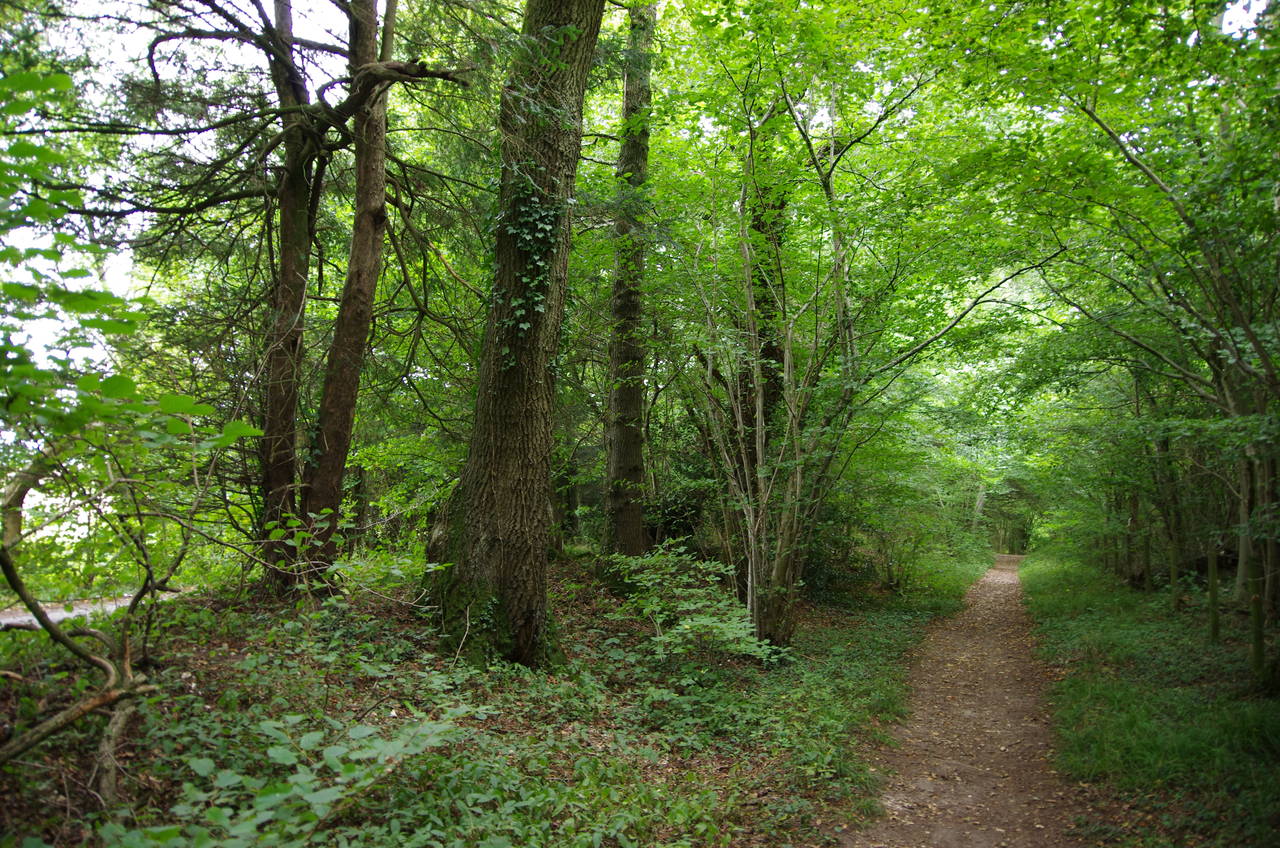
The Way heads west along Sarum Road (picture 15), crossing Sparsholt Road and continuing ahead along the road into the Farley Mount Country Park as the road runs along the edge of Crab Wood. For part of the way, there is a path through the wood a little to the right of the road (picture 16), but that path rejoins the road some distance before the Way reaches the first of several car parks in the Country Park.

(17) Farley Mount Country Park

(18) Farley Mount Monument
(19) Farley Mount Monument

(20) View from Farley Mount Monument
The Way turns right into the carpark then immediately left past a barrier and on ahead through a wooden gate to join a grassy path across Pitt Down, generally parallel to the road but sometimes out of sight of it (picture 17). A kilometre after leaving the road, the Way returns to it, bearing left at a fork into a carpark and then joining a track beyond a barrier at the far end to run alongside Beaconhill Wood.
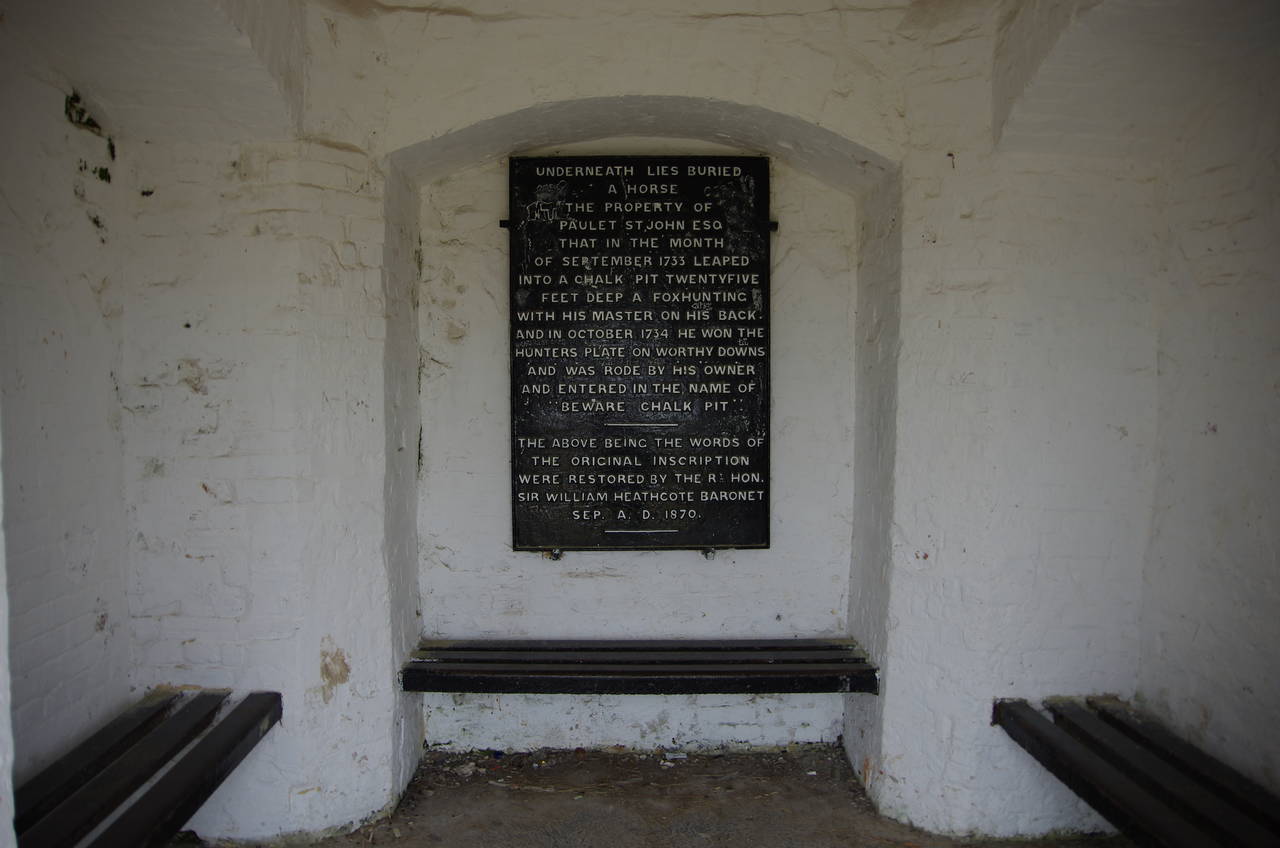
Around 400 metres along the track is a wooden gate on the left, where I took a brief diversion for about 100 metres up to the Farley Mount Monument, a white pyramid that stands atop a large mound (picture 18). Climbing up onto the mound, one finds that the monument contains some wooden benches and a plaque explaining the monument's purpose (click on picture 19 to see a larger version). From atop the mound there are also good views over the surrounding countryside (picture 20).

(21) Beacon Hill

(22) Nice path across ploughed field

(23) Approaching Charlwood Copse
(24) Path beside Gunners Earth Copse
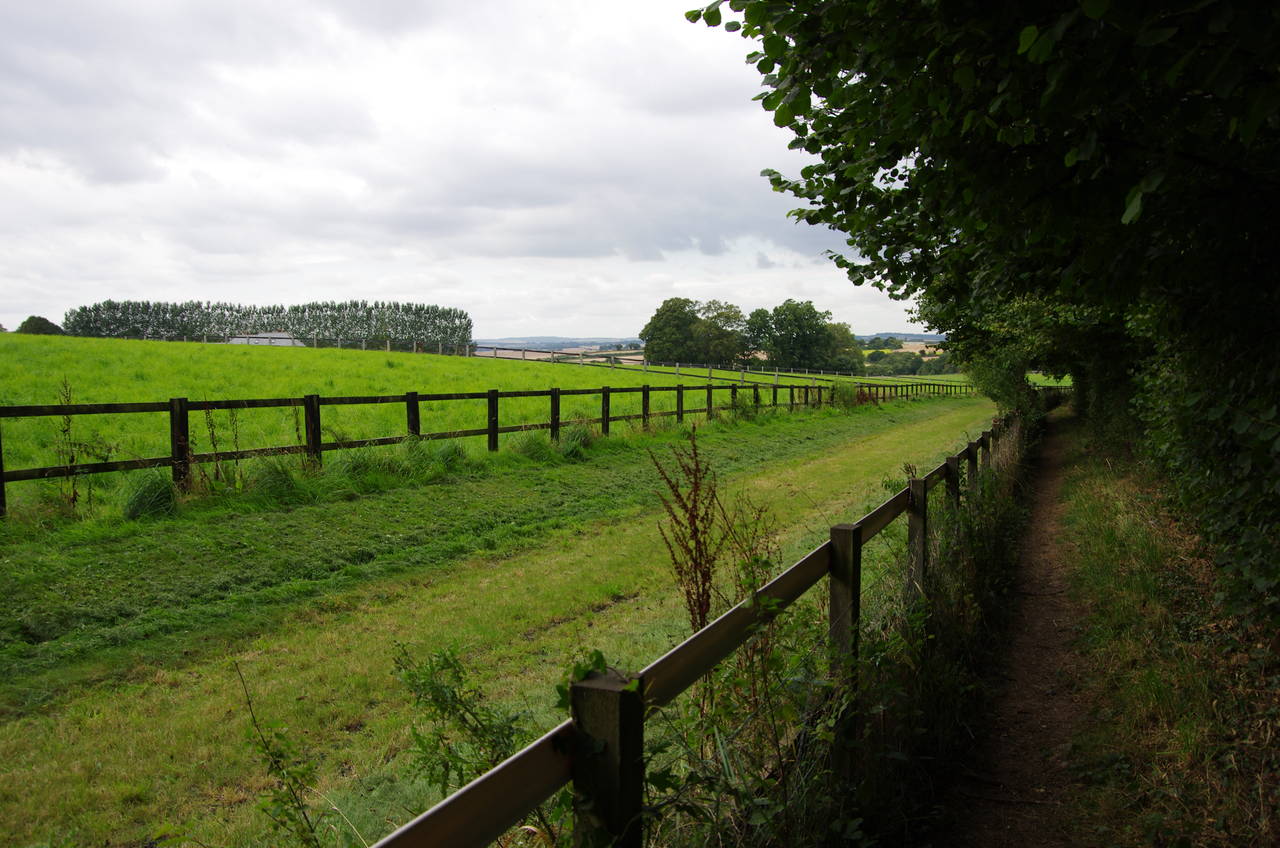
Retracing my steps to the main track, I continued for about 400 metres, until the track bends to the left. Here the Clarendon Way instead bears right to join a path across Beacon Hill (picture 21), initially beside woods before crossing two fields where the farmer had very thoughtfully left a nice grassy path instead of ploughing over the right of way (picture 22). I really wish more farmers would follow that example as it makes a big difference in wet weather.
In the far corner of the field, the Way almost reaches Sarum Road again, but turns left just short of the road to follow an enclosed path along the field edge. After about 200 metres, this path turns right and continues between wire fences towards Charlwood Copse (picture 23).
The path cuts through to the other side of the copse then follows a path along its edge to the adjoining Gunners Earth Copse. The path eventually turns right to follow the edge of the copse beside a long horse galloping track (picture 24).
(25) Approaching King's Sombourne

(26) King's Sombourne

(27) Footbridge over River Test

(28) River Test
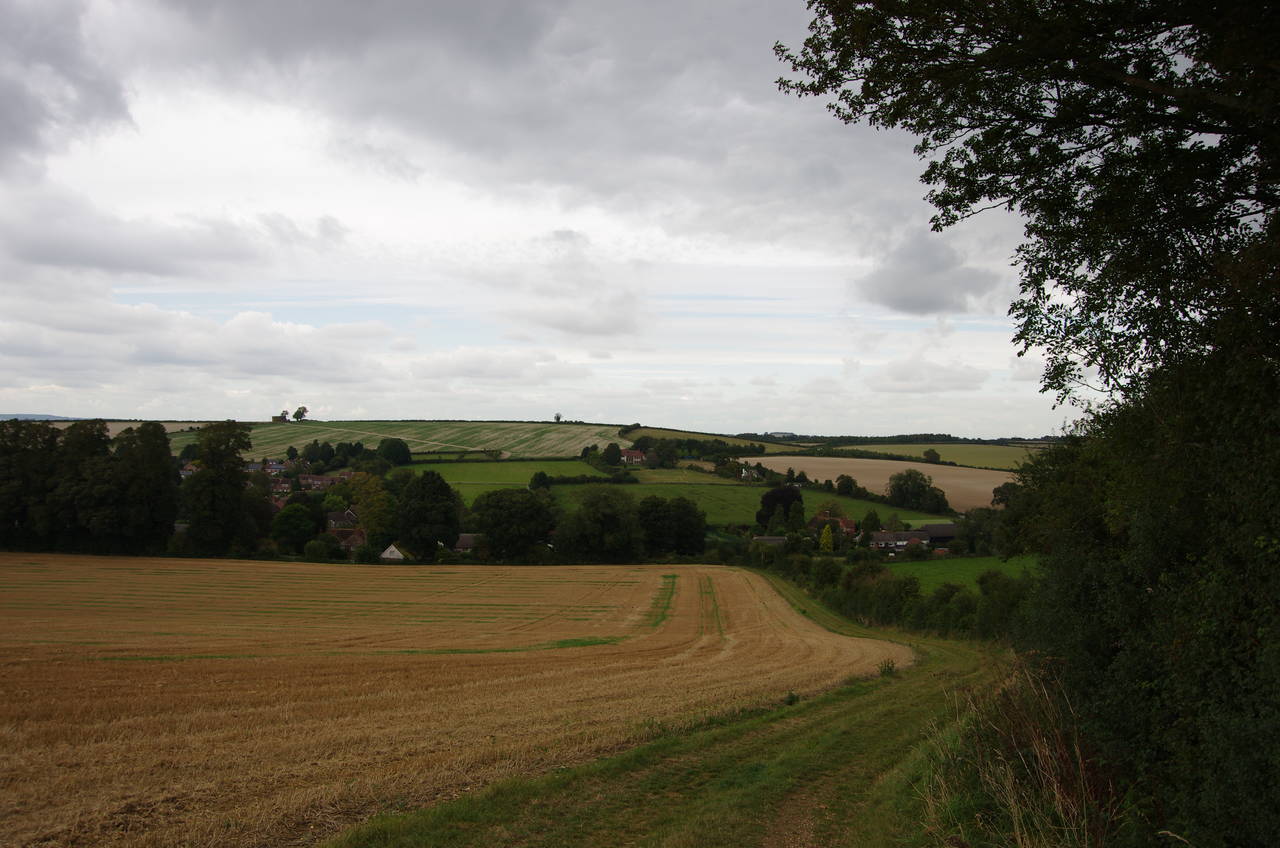
When the track finally curves away to the left, the Clarendon Way continues ahead in a north-westerly direction for a kilometre, climbing over a small hill before the village of King's Sombourne comes into sight in the valley on the other side (picture 25). Descending from the hill, the Way reaches Wincehster Road at the eastern edge of the village, turning left to head past thatched houses (picture 26).
When Winchester Road bends left, the Way continues ahead on Old Vicarage Lane, bearing right when the lane forks to reach Stockbridge Road. Across the road and a few metres to the right, the Way turns into Cow Drove Hill, following the quiet lane uphill out of the village and between fields.
After 400 metres the Way turns left into How Park, another country lane, which heads across the valley of the River Test for the next two kilometres to the hamlet of Houghton. About half way along How Park, the Way is crossed by the Test Way, a 79 kilometre long-distance path that follows the River Test, and is joined by the Monarch's Way, a 990-kilometre route that traces the route taken by the Prince of Wales (later to become King Charles II) across southern England as he fled to the Continent after the English Civil War. The Monarch's Way accompanies the Clarendon Way for the rest of the day.
Shortly thereafter, How Park crosses the Park Stream and another minor channel of the Test, before crossing fields to an arched footbridge (picture 27) that crosses the main channel of the River Test (picture 28).

(29) Houghton

(30) Faithfulls Drove
(31) Clarendon Way Millenium Sculpture
(32) The Tally Ho! Inn, Broughton
A short distance ahead the path reaches the main road through Houghton (picture 29), following it to the left for about 200 metres before turning right on Faithfulls Drove. Fairly soon this degenerates from a tarmac lane to a dusty farm track as it crosses rolling farmland (picture 30). After two kilometres the track turns off to the right, but the Clarendon Way continues ahead across one more field to a gap in the hedge on the far side where steps go down to Rookery Lane, just outside the village of Broughton. By the roadside is the Clarendon Way Millenium Sculpture (picture 31).
A gap in the hedge across the road and just to the right leads to a path which follows a series of field edges, skirting along the edge of the long village for around a kilometre, though the village is mostly hidden behind tall hedges and stone walls. Eventually a signpost points to the left, across a bridge over Wallop Brook and ahead along the length of Rectory Lane to meet the High Street in the middle of the village. The name of Wallop Brook is a reminder that the humourously-named villages of Over Wallop, Middle Wallop and Nether Wallop (collectively known as The Wallops) lie just a few kilometres away to the north.
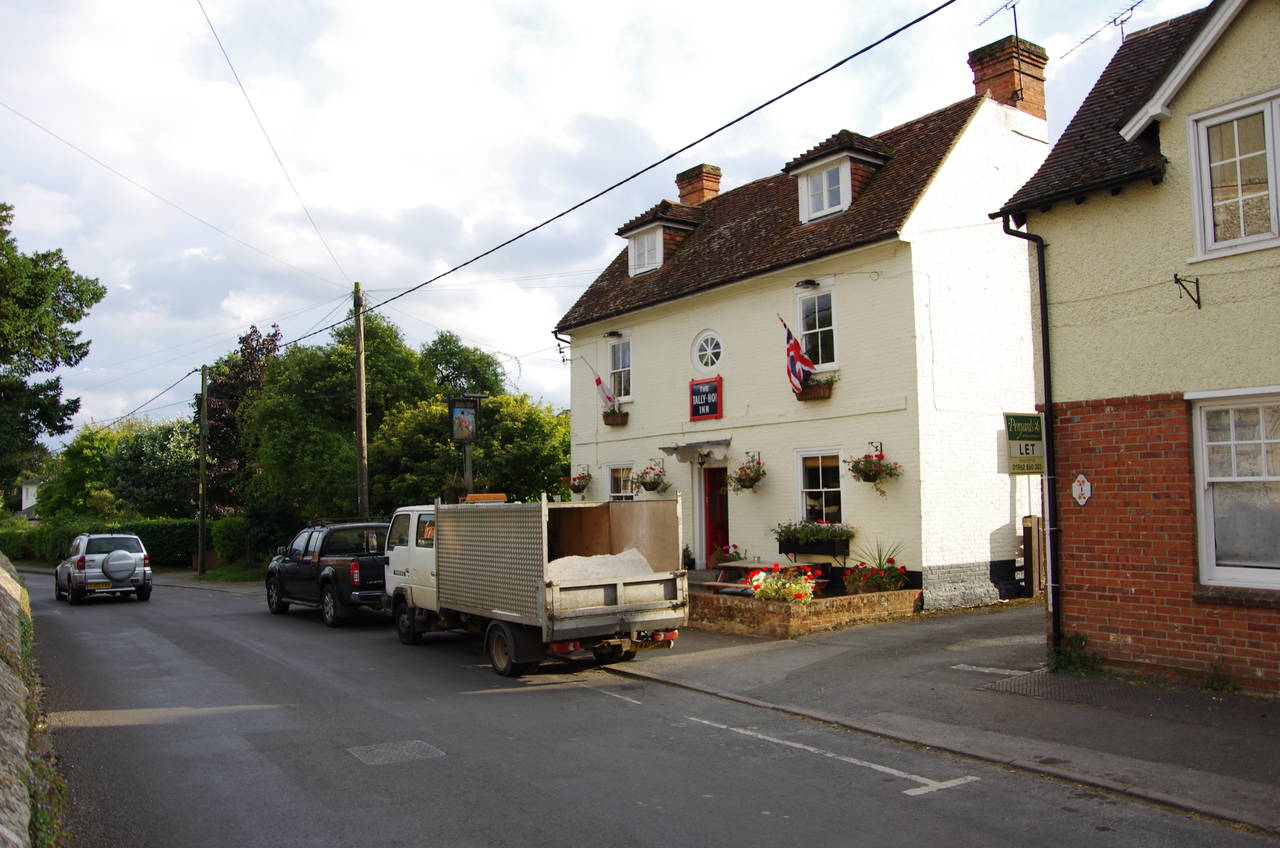
The Way bears left across the High Street into Queenwood Road, where the Grey Hound pub stands on the corner. I had planned to stop here for a rather late lunch, but discovered that it had closed down. A passing villager helpfully informed me that "there's a better pub a few doors further along the High Street", so I made my way along to the Tally Ho! Inn (picture 32) for a pint and a snack.

(33) Broughton

(34) Cold Harbour

(35) Buckholt Farm

(36) Buckholt Lane
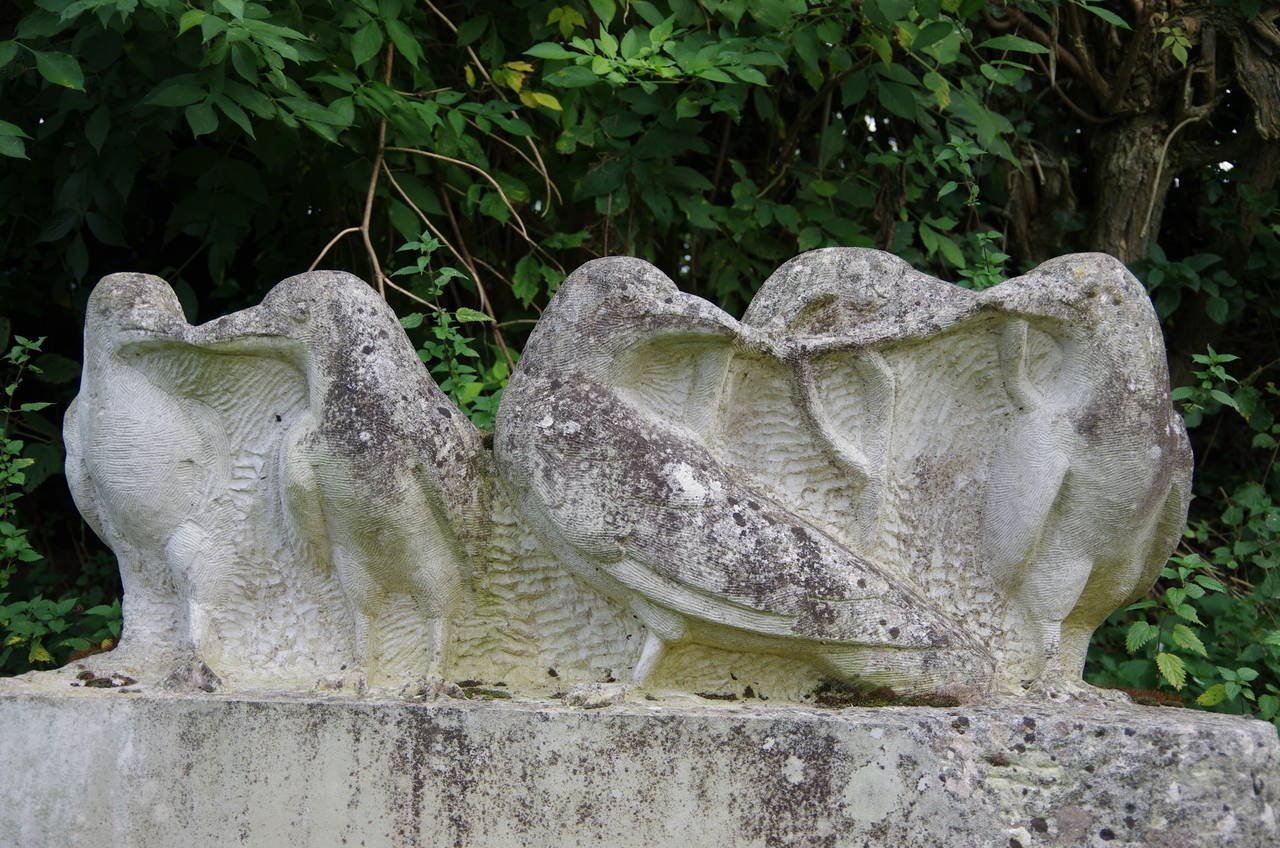
Rejoining the Way and heading along Queenwood Road, I reached a junction where a rather elaborate bird bath stands in the middle of a small green (picture 33). The route turns right here, briefly following the B3084 Salisbury Road before turning left into Buckholt Road, which soon leads out of the village and past Church Farm before becoming a rough track which soon forks. The Way takes the right branch, which heads into an area of woodland called Smith's Plantation.
The path soon emerges from the plantation, continuing ahead across an area of rolling farm land called Cold Harbour (picture 34) for about two kilometres to reach Buckholt Farm, where the first building encountered is a rather large hay barn (picture 35).
The Way heads around to the left of the barn and a couple of other farm buildings to join Buckholt Lane (another section of the old Roman Road), which makes a long gentle descent for the next kilometre (picture 36).
(37) Lower Noad's Copse
(38) Approaching Middle Winterslow

(39) Middle Winterslow

(40) Winterslow Central Stores
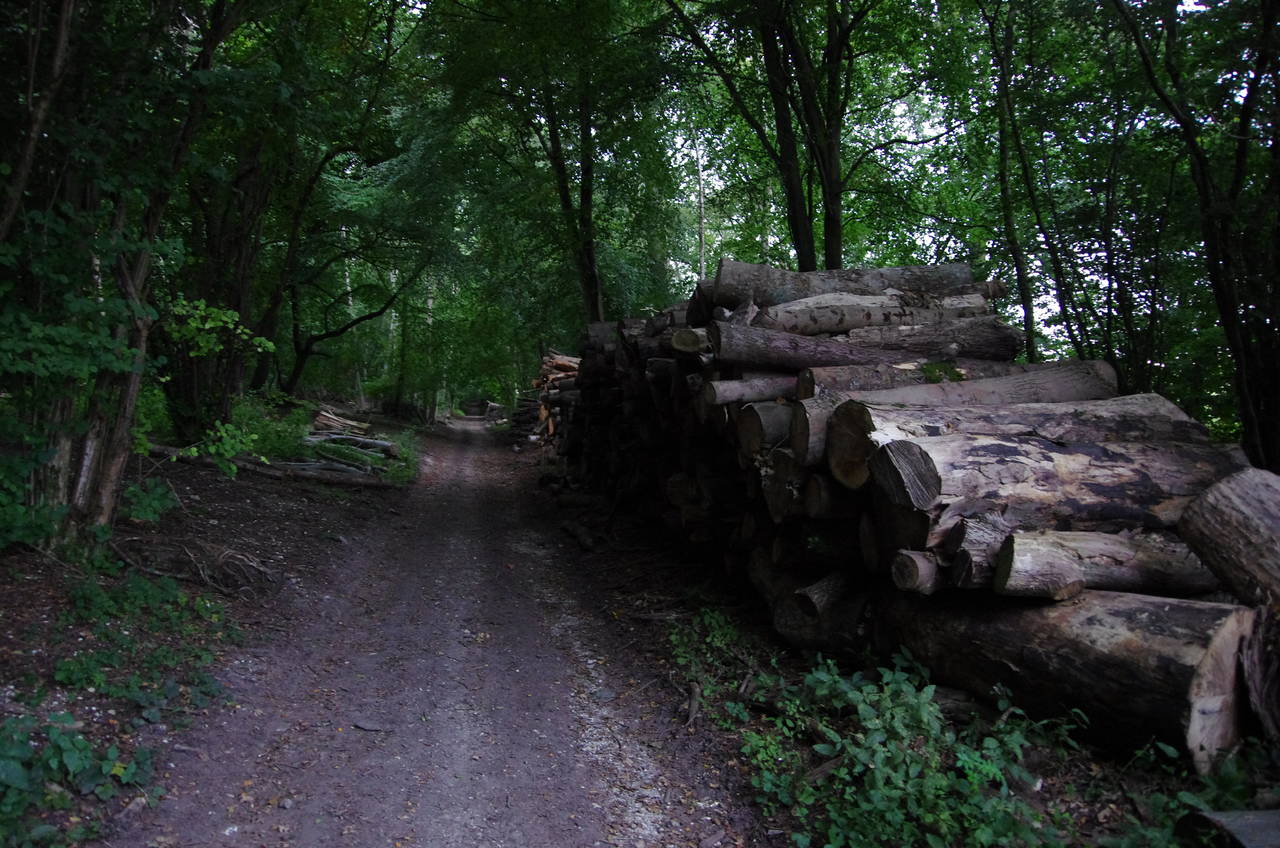
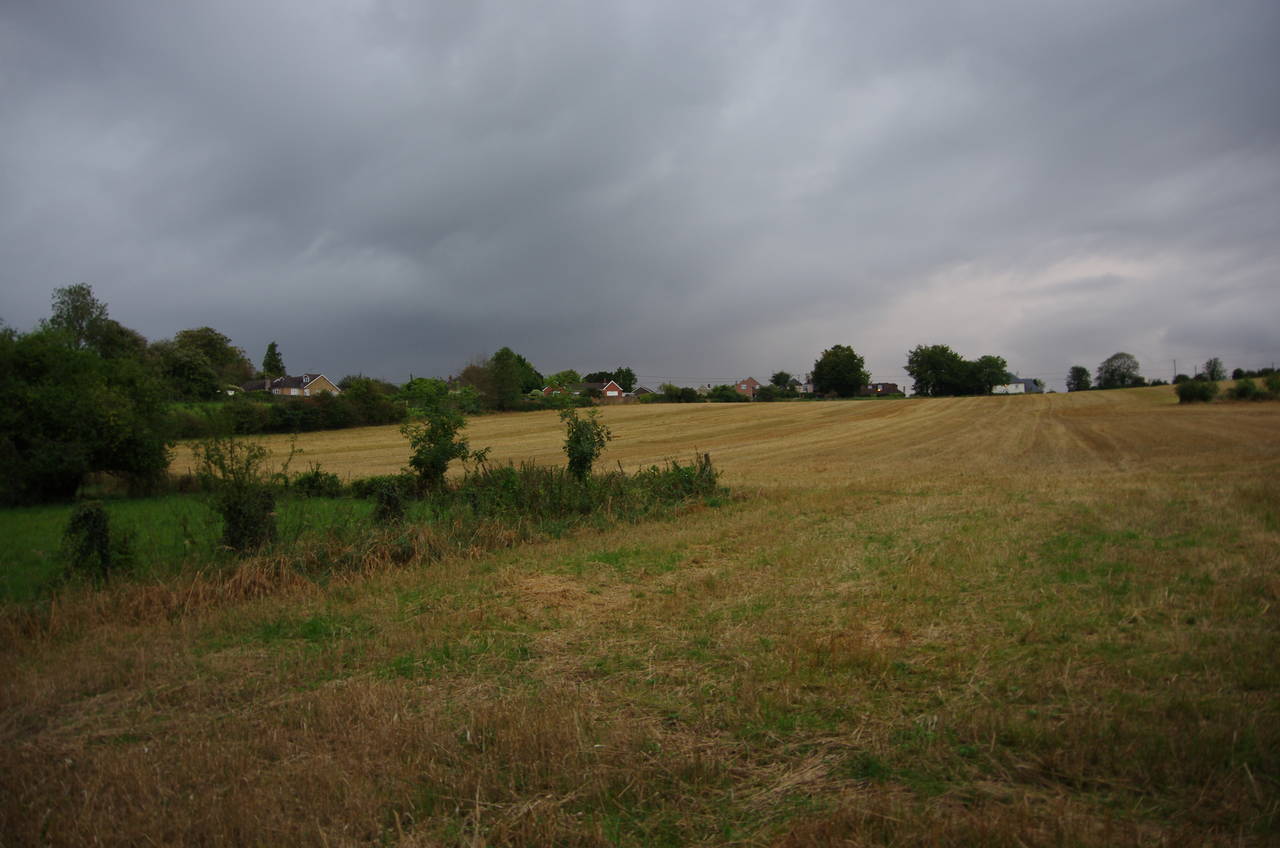
Buckholt Lane ends at a T-junction with The Warren. Across the road a path continues ahead, running just inside the edge of Lower Noad's Copse, where there was evidence of recent logging (picture 37), and then the adjoining Upper Noad's Copse. After a little over a kilometre, the path leaves the woods and continues ahead on Easton Common Hill, which approaches the village of Middle Winterslow (picture 38).
At the end of Easton Common Hill, the Way crosses Mill Road and cuts across a grassy corner behind a bus shelter and on along Gunville Hill. At a junction, the route continues ahead on The Flashett to the next corner, where it bears left through a gate and diagonally across a field (picture 39) to join a lane called The Causeway.
The Causeway ends at Middleton Road, which the Way crosses to take a tarmac footpath along the right-hand edge of another field, then ahead past a few houses to arrive at the Winterslow Central Stores (picture 40) and the end of a fairly long day's walking. I had only a short wait at the bus stop just around the corner from the Stores to catch the last bus of the day to Salisbury.
My GPS showed a distance of 32.5 kilometres walked, but the distance covered on the Clarendon Way was roughly 31.4 kilometres, as I had walked an extra 1.1 kilometres when I went off course at Oliver's Battery early in the day.