THE THAMES PATH
Stage 6: Wallingford to Reading
Friday, June 10, 2011

(1) Wallingford Town Hall and St Mary's Church

(2) High Street, Wallingford
(3) St Peter's Church, Wallingford

(4) St Leonard's Church, Wallingford
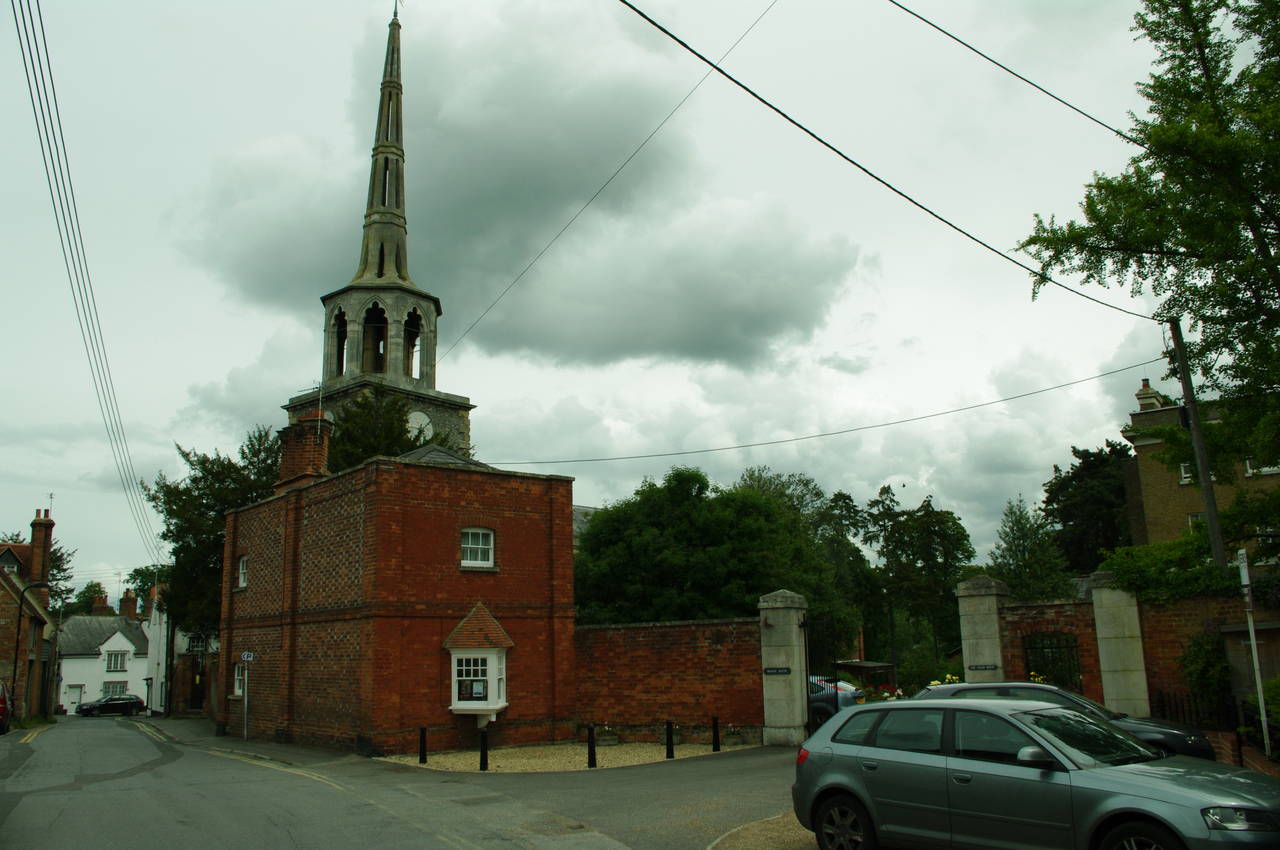
It was another cool and overcast morning as I returned to Wallingford by bus from Reading Station, alighting at the main bus stop beside the market square. On one side of the square stands the 1670 Town Hall and behind it the stone tower of St Mary's Church (picture 1).
From the market square, I retraced my steps back along St Mary's Street to the High Street and then down to the junction with Thames Street, where I had left the Thames Path the previous evening. Thames Street passes quite close by St Peter's Church, but from there it is only possible to see the 18th-century spire towering above the other buildings (picture 3). The path follows Thames Street to its end in front of the flint St Leonard's Church (picture 4), where the path turns left.

(5) Path through terrace, Wallingford

(6) Riverside house, Wallingford

(7) Slipway near Wallingford

(8) Approaching Winterbrook Bridge
The path now heads through a row of cottages (picture 5) and emerges in a lane, turning left to return to the Thames. Heading along the riverbank, the path passes a rather fancy building (picture 6) -- I'm not quite sure if it is a home, a boathouse, or perhaps both. The path then passes by a slipway (picture 7), along a shady stretch of riverbank and eventually out into an open field and under the Winterbrook Bridge (picture 8), which was built in 1993 to carry a bypass road around Wallingford.

(9) Thames Path opposite Carmel College

(10) Field filled with white flowers
(11) WWII pillbox next to the path

(12) Moulsford Railway Bridge
The path continues through a gate with the buildings of Carmel College briefly visible amongst the trees on the opposite bank (picture 9) and then follows a straight stretch of river past meadows until the river bends to the right opposite the village of North Stoke, through which the Ridgeway National Trail comes down to join the opposite bank of the Thames, paralleling the Thames Path for the next few kilometres.
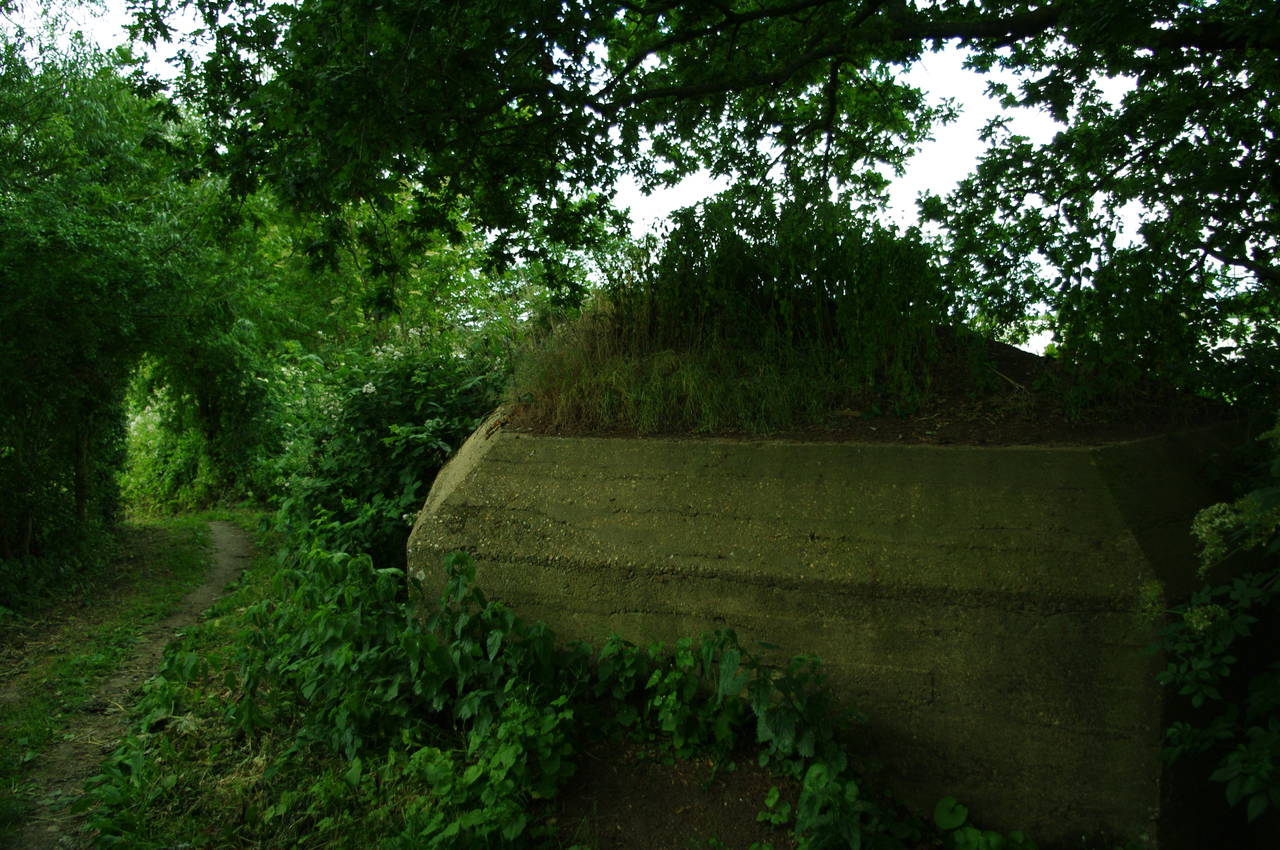
Around the bend, the path passes a vast field which was carpeted with white flowers (picture 10) before eventually entering a more enclosed path past a sunken pillbox (picture 11) and passing under the Moulsford Railway Bridge (picture 12). This is actually a pair of bridges; the upstream bridge was built in 1892 as a copy of the downstream bridge, which was completed in 1839. The bridges carry the Great Western Mainline between Reading and Didcot Parkway, and are interesting for their "skew-brick" construction, where the bricks under the arhces are laid at an angle rather than horizontally.

(13) Offlands Farm

(14) House on the A329, Moulsford

(15) Beetle and Wedge, Moulsford
(16) A narrowboat named Tranquility
Immediately beyond the railway bridge, the Thames Path leaves the river and skirts around a field to reach a hedge-lined farm track that leads up to the A329 road at Offlands Farm (picture 13). The route turns left and follows the road south for just over a kilometre, passing a cricket field on the left and heading through the village of Moulsford, which has several attractive old houses (picture 14).
The path turns left into Ferry Lane, following it back down to the riverside Beetle and Wedge pub, where the path goes around the left-hand side of the pub and then turns right along the riverbank (picture 15).
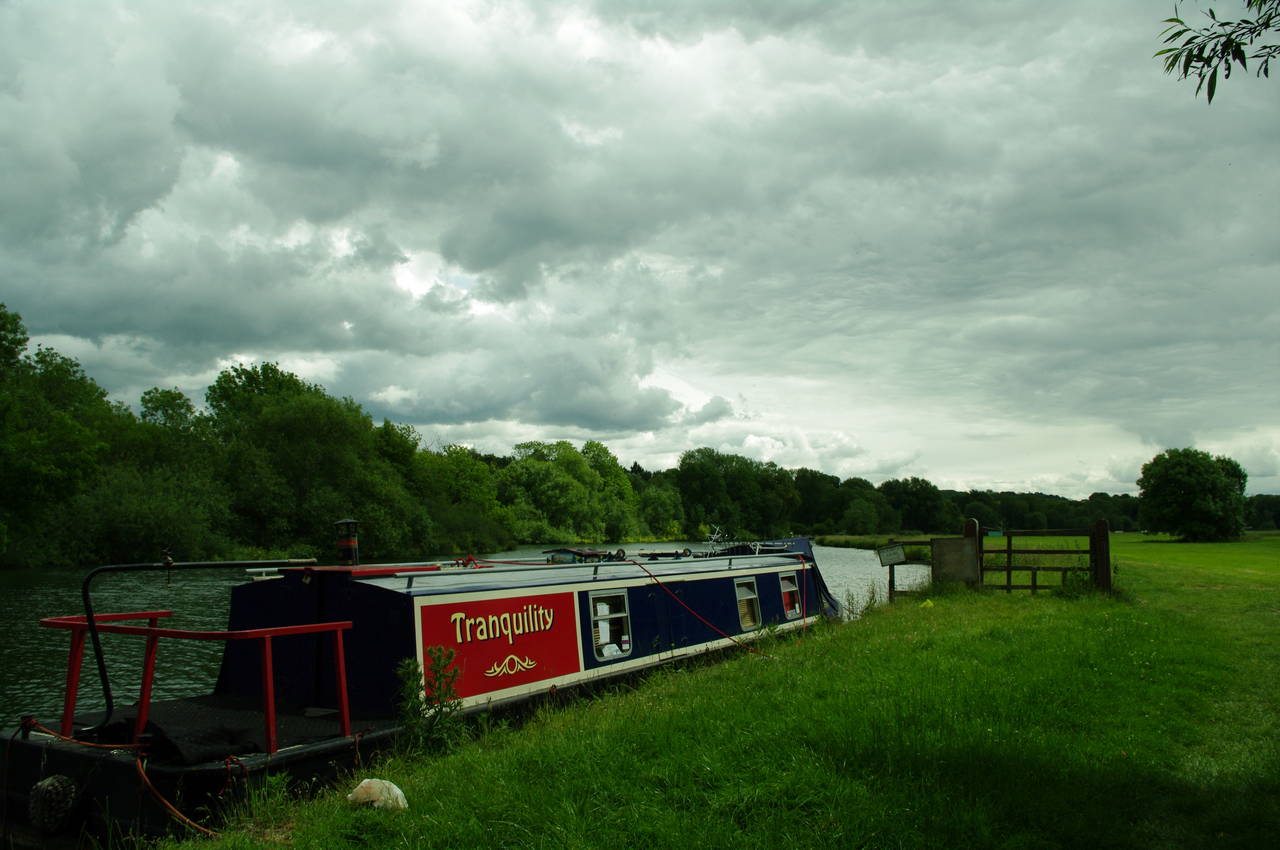
From the pub, the route follows the towpath downstream, soon passing large open fields beside which a narrowboat, aptly named Tranquility was moored (picture 16). Along this section of the river, the path crosses from Oxfordshire into the county of Berkshire.

(17) Cleeve Lock
(18) Boathouses at Goring

(19) View ahead to Goring Lock and Goring Gap

(20) Parish Church of St Mary, Streatley
Gradually, more homes and boathouses start to appear on the far bank and the path soon reaches Cleeve Lock (picture 17). At 10.4 kilometres, the stretch of the Thames between Benson Lock and Cleeve Lock is the longest distance between two locks on the entire Thames, yet even then the river only falls around 70 centimetres through Cleeve Lock, the smallest fall of any lock on the river.
Beyond Cleeve Lock, the path follows the river through a patch of woodland and across a bridge over a small channel that leads into a private marina. As the path continues downstream, a number of boathouses can be seen across the river at Goring (picture 18), while ahead the white lockkeeper's house of Goring Lock is dwarfed by the hills through which the Thames passes beyond Goring (picture 19). The section of river between Cleeve Lock and Goring Lock is the shortest distance between two locks on the Thames, at just one kilometre.
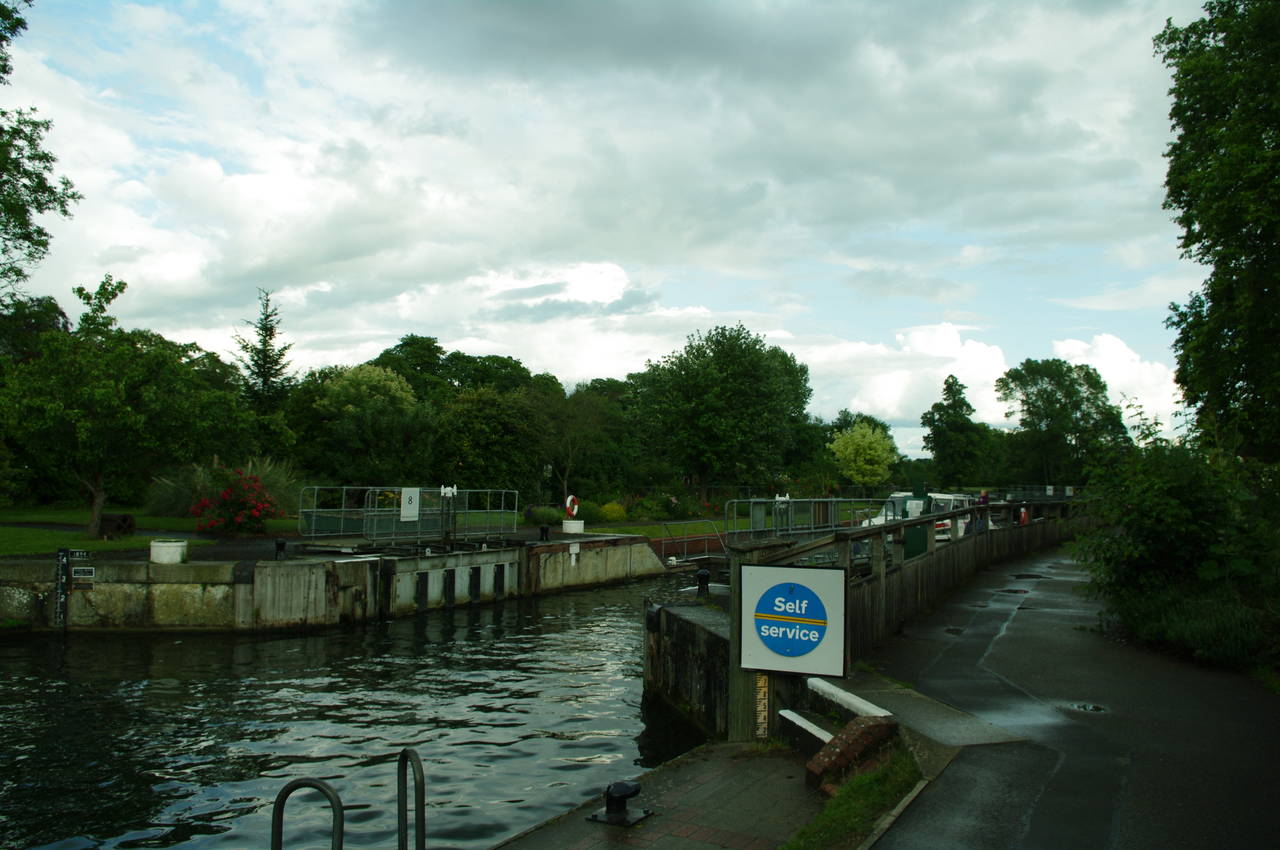
Just before Goring Lock, the path leaves the riverbank, crosses over a wooden footbridge and skirts around a patch of woodland to join a lane on the edge of the village of Streatley, soon passing the Parish Church of St Mary (picture 20) to reach the B4009 road.

(21) Goring Weir and Lock

(22) Goring and Streatley Bridge

(23) Goring Gap

(24) View to the Chiltern Hills
The route turns left and crosses the Goring and Streatley Bridge, returning to Oxfordshire. The bridge crosses two channels of the river and from the second span there are good views back upriver to Goring Weir and Goring Lock (picture 21). On the bridge the Thames Path briefly shares the route of the Ridgeway National Trail, which runs roughly north-east for 139km from Avebury through Goring to Ivinghoe Beacon.
Beyond the end of the bridge, the path crosses the road and turns right to follow a footpath back down to the river beside the bridge (picture 22). Turning left to follow the riverbank downstream, the Thames Path passes through Goring Gap, a channel cut through the hills by the river at the end of the last ice age. For a while the path is shaded by trees, while the thickly-wooded hills of the Berkshire Downs rise steeply on the opposite bank (picture 23). When the path emerges into an open meadow, there are good views of the Chiltern Hills in the distance to the left (picture 24).

(25) Gatehampton Railway Bridge

(26) Ferry Cottage

(27) Path beyond Gatehampton Ferry

(28) Pillbox on the steep river bank
The path soon passes under the Gatehampton Railway Bridge (picture 25), where a WWII pillbox stands next to the end of the bridge. The bridge is about a century older than the pillbox.
The footpath then follows beside a wooden fence for a few hundred metres to Ferry Cottage (picture 26), where the towpath switches to the other side of the river. As there is no longer a ferry here, the path is forced to divert to the left, around the cottage, and then follows a narrow track parallel to the river with the Chiltern Hills rising to the left (picture 27). The path soon enters a pleasant shady wood and gradually climbs higher up the steep river bank, passing above another pillbox (picture 28).

(29) Coombe Park Farm

(30) St Mary's Church, Whitchurch

(31) Whitchurch Bridge

(32) Thames Path below Pangbourne
Around two kilometres beyond Ferry Cottage, the path stops running parallel to the river and instead bears left and climbs out of the woods to Coombe Park Farm. The path soon descends steeply into a small valley before climbing equally steeply up the other side, soon joining a tree-lined farm road (picture 29).
Along this stretch of the path, I passed two elderly women who had apparently gotten off a boat down-river at Whitchurch to take a short walk along the river while the boat waited to go through the lock. They didn't seem entirely thrilled when I showed them on my map that it was going to be another three kilometres before the next point where they could get back on their boat.
The farm road leads up to the B471 road, where the route of the Thames Path turns right and heads downhill through the village of Whitchurch-on-Thames. A short distance past the Greyhound pub, a signpost points the route to the right along a driveway to St Mary's Church (picture 30). The route heads diagonally left across the churchyard to join an enclosed footpath between two brick walls, which soon leads back to the water near Whitchurch Mill.
The path soon returns to the road near a toll booth at the end of Whitchurch Bridge and turns right to cross over the bridge to the village of Pangbourne, returning to Berkshire in the process. Just out of sight in the trees upstream of the bridge is Whitchurch Lock, which if I remember rightly is the first lock that the Thames Path has completely bypassed.
On the far side of the bridge, the path turns left through the car park of the Pangbourne Recreation Ground and across a field to rejoin the riverbank. As I crossed the car park it started to rain and I stopped to take shelter under the edge of the sports centre beside the car park. This proved to be a wise decision as within a couple of minutes it was raining heavily.
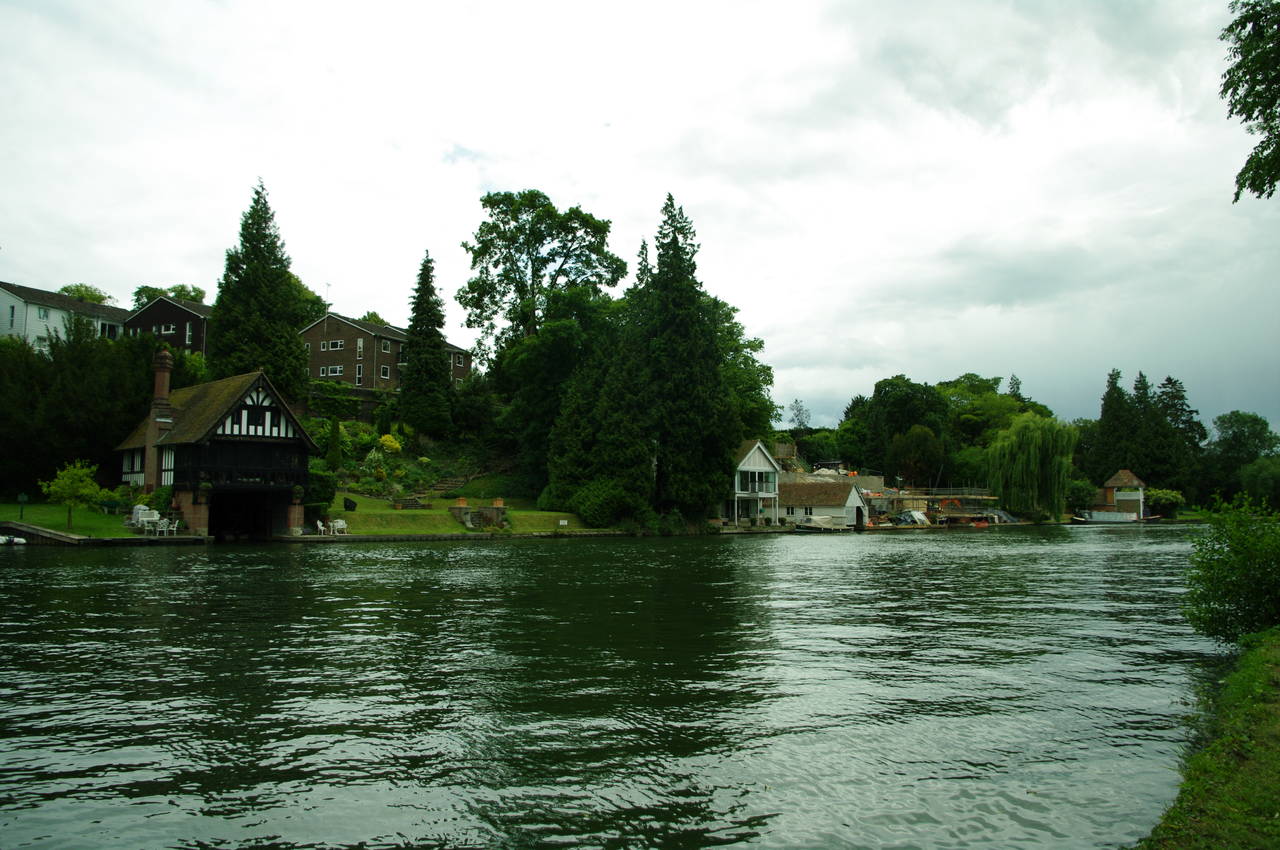
It was just over an hour before the rain stooped and I could resume my walk, crossing the recreation ground to rejoin the riverbank where I could get a much better view of the Whitchurch Bridge (picture 31). I have read that the company that owns the privately-operated toll bridge plans to begin construction work on a replacement bridge in late 2011.
Leaving Pangbourne behind, the Thames Path follows a long and very gradual curve to the right through a succession of open meadows with low hills rising on the opposite bank (picture 32).
(33) Mapledurham Lock

(34) Thameside Promenade, Reading

(35) Caversham Bridge
(36) Approaching Reading Bridge
A little more than three kilometres after leaving Pangbourne, the path reaches Mapledurham Lock (picture 33), where the level of the Thames drops just over two metres. Immediately after passing along the side of the lock, the path leaves the river and turns to the right and crosses a field to join a minor road called Mapledurham Drive.
Here the Thames Path becomes urban for a while, as the route follows the road along the edge of the town of Purley-on-Thames with an open field to the right, but many houses on the left. At the end of Mapledurham Drive, the path continues ahead along New Hill, crossing a bridge over a railway line before turning left into Hazel Road. The route follows Hazel Road as it snakes its way through a newish housing estate, eventually taking a right turn into Skerritt Way, which leads to a cul-de-sac where some concrete steps on the right climb up to the A329 Oxford Road
Following the road to the left, the footpath very soon passes a sign saying "Welcome to Reading", though it was still around five and a half kilometres walk to the centre of Reading.
A short distance further along the road, the route reaches a large pub, where I had been planning to finish the day's walk and get a meal before heading to the nearby Tilehurst Station. Unfortunately, it turned out that the pub was closed for refurbishment, so I decided to press on to Reading as there was still about three hours daylight left.
Beside the pub, the Thames Path turns left and heads down some steps and across a footbridge over the Great Western Mainline. Some more steps lead back down to the bank of the Thames, where the path turns right past another "Welcome to Reading" sign and runs parallel to the railway line. Every few minutes a train would thunder along the tracks just a few metres uphill to the right of the path.
After about 20 minutes walking the path begins to bear left, away from the railway, and follows the river past some grassy meadows with the riverside houses of Caversham gradually becoming more frequent in the woods on the far bank.
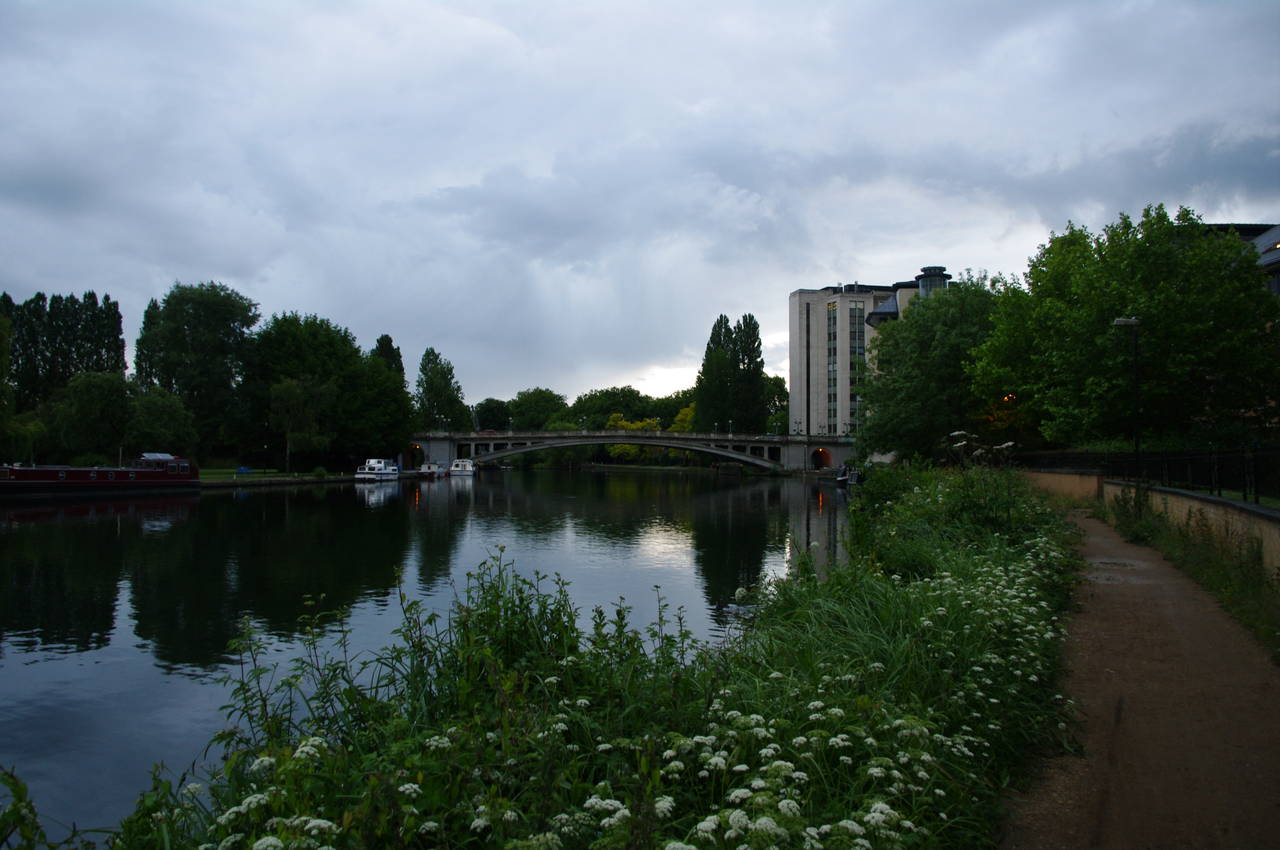
Nearing Reading, the meadows give way to neat parkland and the well-worn path becomes the bitumen footpath of the Thameside Promenade (picture 34). As I walked along this part of the path the rain returned, though this didn't seem to deter a few dozen party-goers who were playing games in kayaks on the water in front of a large house across the river. At the end of the promenade, the Thames Path passes under the Caversham Bridge, where several large groups of swans and ducks were gathered near the riverbank (picture 35).
Beyond Caversham Bridge, the path passes riverside apartments, while out in the middle of the river is the large Fry's Island, which is home to woods, boathouses and a bowling green. Not far past the island, the path reaches Reading Bridge (picture 36), where I left the Thames Path with my GPS reporting 28.6km covered on the path. Steps lead up to the far side of the bridge, from which it was only five minutes walk to reach Reading Station.
Despite the couple of rainy spells in the afternoon, this had been quite an enjoyable day's walk. With around 154km completed, I am now just over half way from the Source to the Thames Barrier.