CAPITAL RING
Stage 1: Woolwich Foot Tunnel to Grove Park
Wednesday, May 30, 2012

(1) Woolwich Foot Tunnel
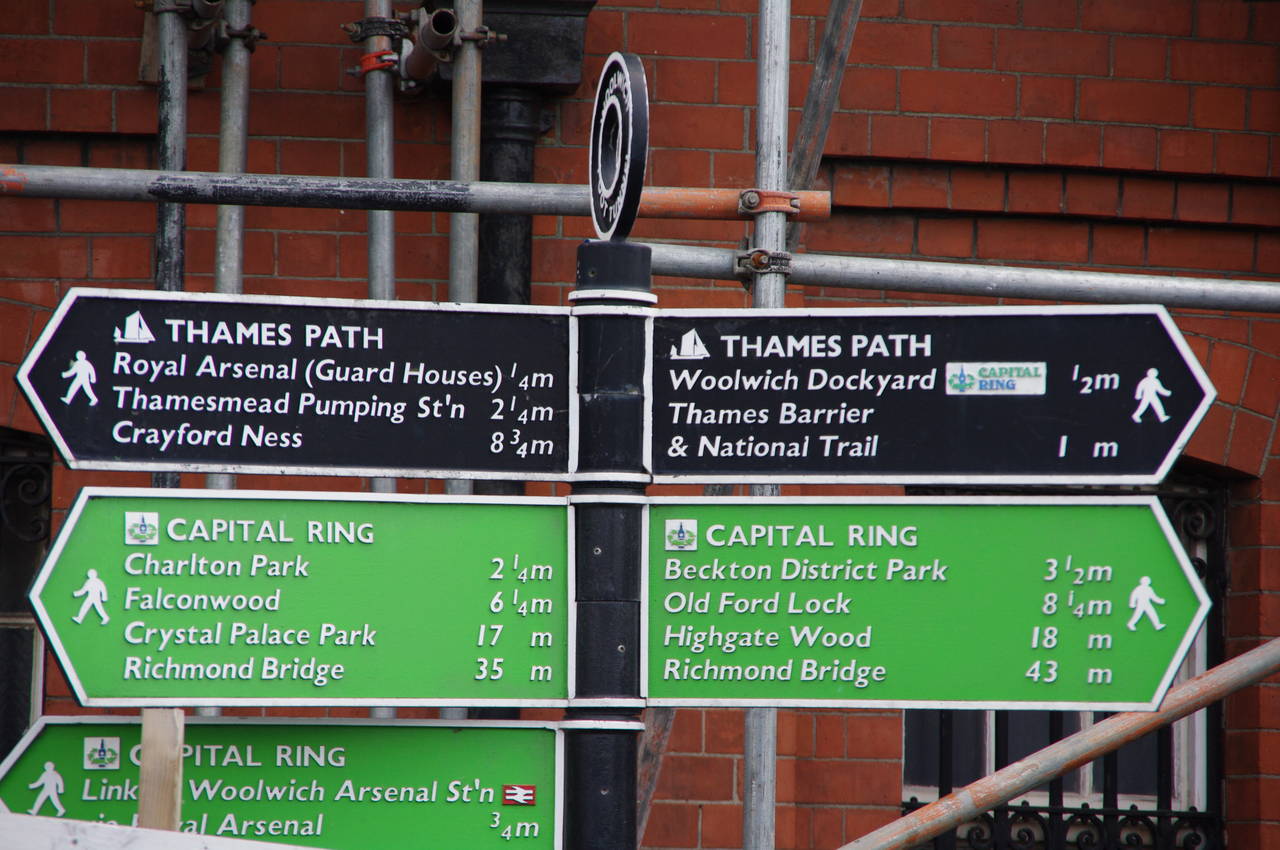
(2) Capital Ring Signpost
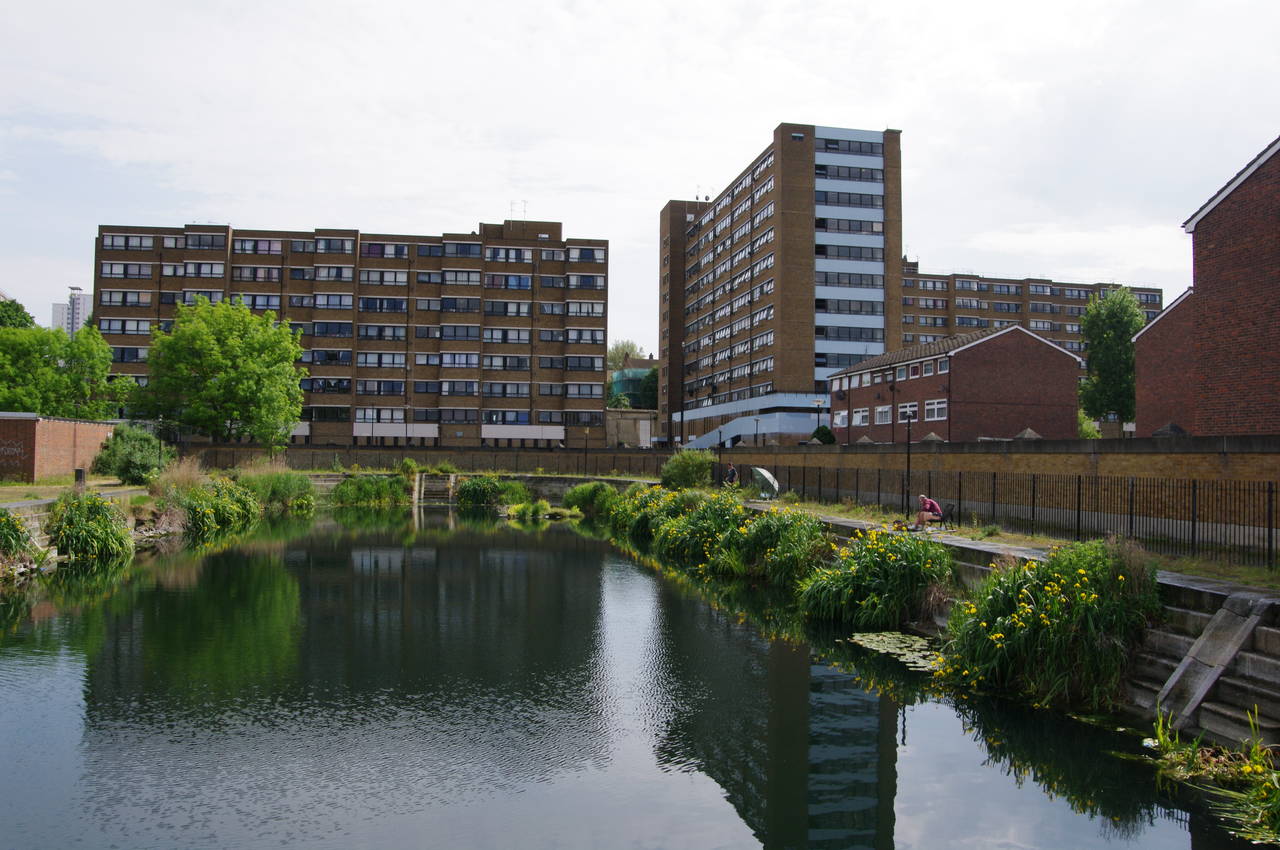
(3) Former Drydock

(4) Linkbridge
I made quite a late start to the first stage of the Capital Ring. Having spent a few hours travelling up from the Isle of Wight by hovercraft to Portsmouth then by train to London, I was keen to get outdoors and do some walking by the time I got to the start of the walk at around 3PM.
Being a circular walk, one can start the Capital Ring anywhere along the route. Due to the way the walk is broken up into fifteen numbered stages by Transport for London, the most popular starting point is on the south bank of the Thames at Woolwich in the city's east, the start of the official Stage 1.
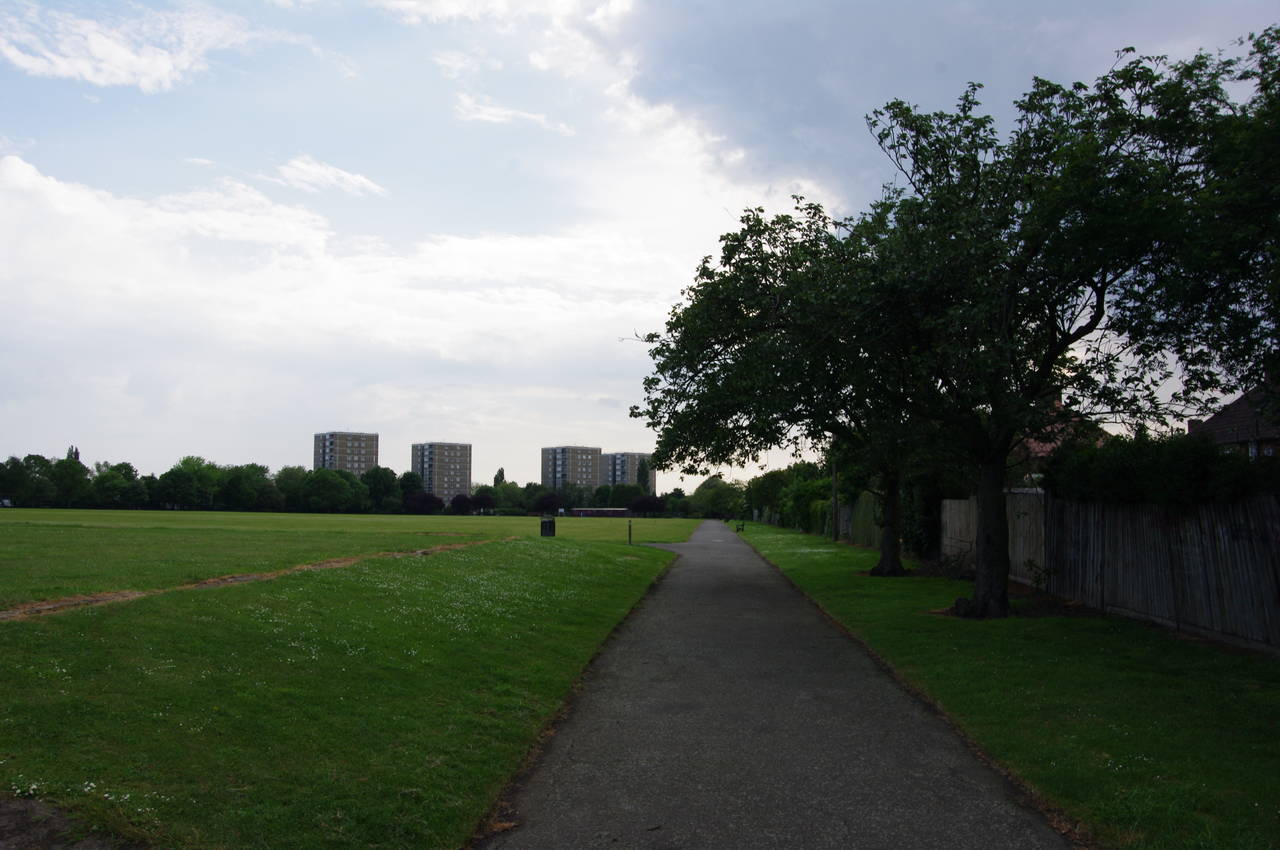
The nearest railway and DLR station is Woolwich Arsenal, from which the Capital Ring is about ten minutes walk downhill through the Royal Arsenal to the river and then another ten minutes upstream to the domed southern entrance of the Woolwich Foot Tunnel.
The tunnel, opened in 1912, allows pedestrians to cross under the Thames to North Woolwich. I had passed this way almost a year earlier while walking the final stage of the Thames Path and on that occasion I had found the tunnel closed for refurbishment. Little seemed to have changed since then, with the entrance covered in scaffolding and plastic (picture 1). Peeking out over the construction hoardings was the first of the Capital Ring's distinctive "main signposts" (picture 2), showing the distances to a number of points on the walk.
From the tunnel entrance, the Capital Ring heads upstream, circling around behind a building before returning to the river by the south pier of the Woolwich Ferry, which carries vehicles across the river parallel to the foot tunnel. A ferry service is thought to have existed here for more than 800 years, and has been toll-free since 1889.
Crossing the approach road for the ferry, the route continues along the river bank past the former Royal Naval Dockyard, which operated from 1512 until 1926, before the land was sold and used for warehouses and apartment buildings. Soon the riverside path passes two former 19th century drydocks, now enclosed as pleasant ponds for the local residents and stocked with fish (picture 3).
A little further upstream the path passes by two small cannons of the Gun Drill Battery, used for training gunners in the 19th century. Further still, the path climbs over a tall brick wall via the rather nautical-looking Linkbridge (picture 4).

(5) Thames Barrier, Millennium Dome & Canary Wharf

(6) The White Horse, Woolwich

(7) Maryon Park

(8) Maryon Wilson Park
Looking upstream from the Linkbridge, the Thames Flood Barrier, the Millennium Dome and the tower blocks of Canary Wharf line up behind one another (picture 5, zoomed). About 75 metres along the riverside path, the Capital Ring turns left through a gap in a fence (signposted as an interim route), leaving the Thames and heading into the Henry's Wharf housing estate. The route turns right beyond the first building, following Harlinger Street a short distance to a left turn into Ruston Road with a tall brick chimney visible ahead over rooftops. At the next T-junction the route turns right, still on Ruston Road which soon bends left to reach a roundabout. Heading around the right side of the roundabout, the Capital Ring joins the A206 Woolwich Road, heading west along the footpath and passing opposite the White Horse pub (picture 6).
At the second pedestrian crossing, the Capital Ring crosses over the busy road and enters the pleasant Maryon Park. Inside the gates, the route heads left to a path junction, then turns right to follow a surfaced path past a playground, across a bridge over a railway line, and then to the right of tennis courts. Beside an open grassy area (picture 7), the Capital Ring turns right up a long flight of steps and through trees to reach Thorntree Road.
Across the road the route enters Maryon Wilson Park (picture 8), following a tarmac path downhill and between the enclosures of the Maryon Wilson Animal Park. Beyond these, the path turns left and is then followed through woods to reach Charlton Park Road.

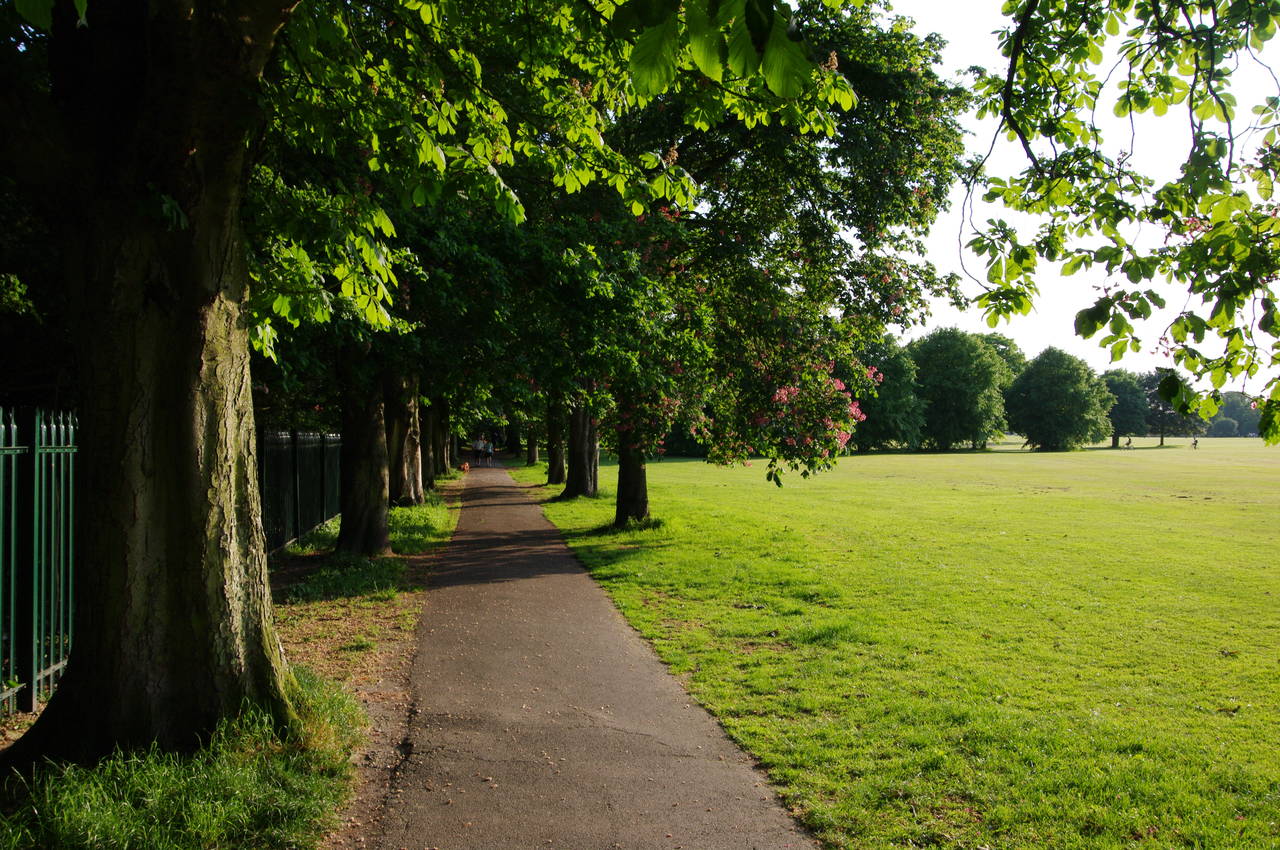
(9) Charlton Park

(10) Charlton House
(11) Hornfair Park, Charlton

(12) BMX track in Hornfair Park
Crossing the road at a pedestrian refuge just along the road to the right, the Capital Ring then turns left on a path a few metres further along the road and heads past a carpark and into Charlton Park. At a junction of paths the route turns right following a tarmac path along an avenue of trees on the edge of the park (picture 9) with playing fields off to the left and the large mansion of Charlton House, built in 1612, ahead (picture 10). All of the parks visited so far on the walk were originally part of the extensive grounds of the house.
At the next path junction, well before the house, the path turns left along the edge of the playing fields, then at the far corner of the park turns left again to walk along the grass just inside the fence and parallel to Canberra Road (a name I didn't expect to see this far from Australia). After about 200 metres, the Capital Ring leaves the park through a gate and crosses Canberra Road, briefly following Charlton Park Lane before taking the first left turn into Inigo Jones Road, named after the 17th-century architect known for his work on a number of London's famous buildings.
At the end of the road, the Capital Ring continues ahead between houses and into Hornfair Park, named after the Charlton Horn Fair, which ran from some time in the 1500's until 1872. The fair was revived in 1973 and continues to take place each June.
The route sticks to the tarmac path, turning right on entering the park (picture 11) then soon left to cross the park beside a new BMX track (picture 12). Reaching the far edge of the park, the route turns left along a narrow dirt track leading through a gate into a car park belonging to the large Queen Elizabeth Hospital then bearing right through the carpark to reach Stadium Road.

(13) Woolwich Common

(14) View towards Shooters Hill
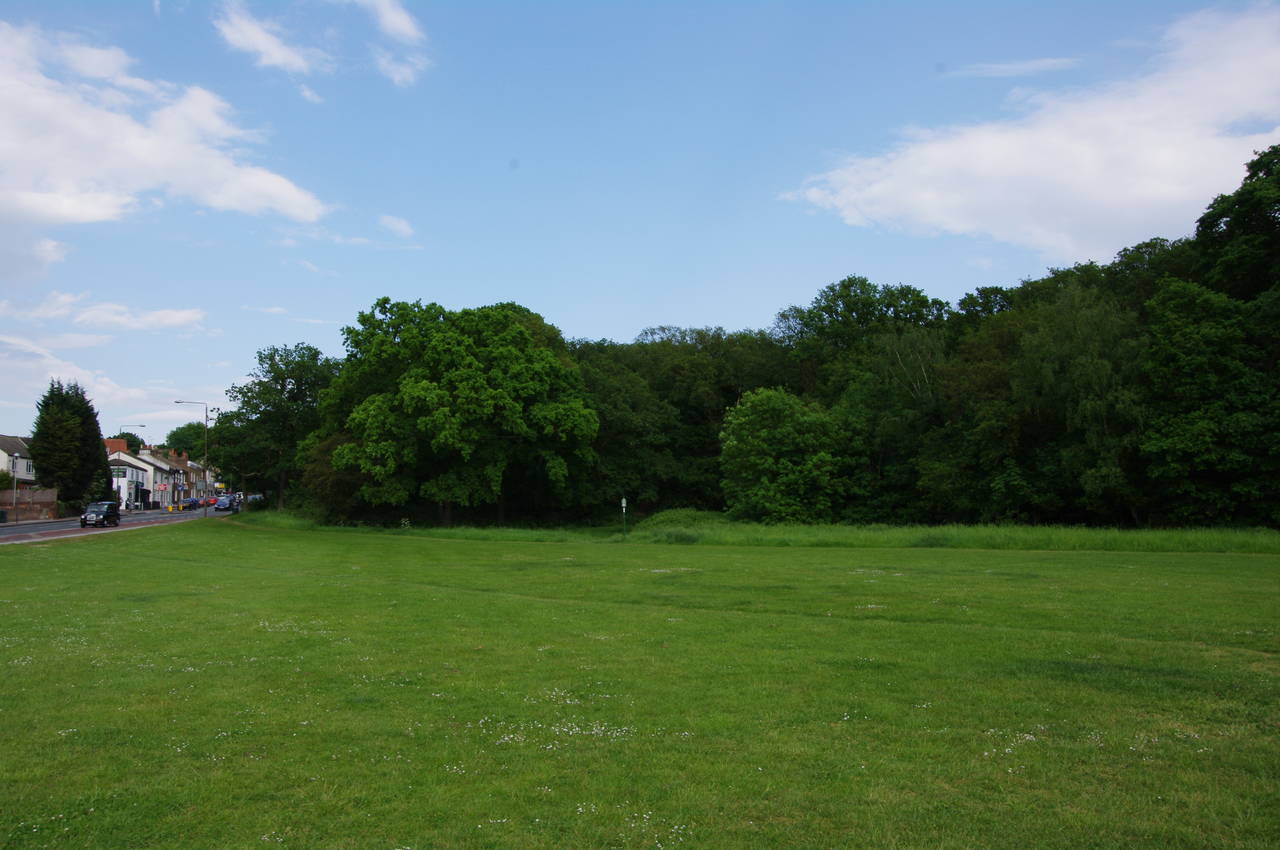
(15) Eltham Common
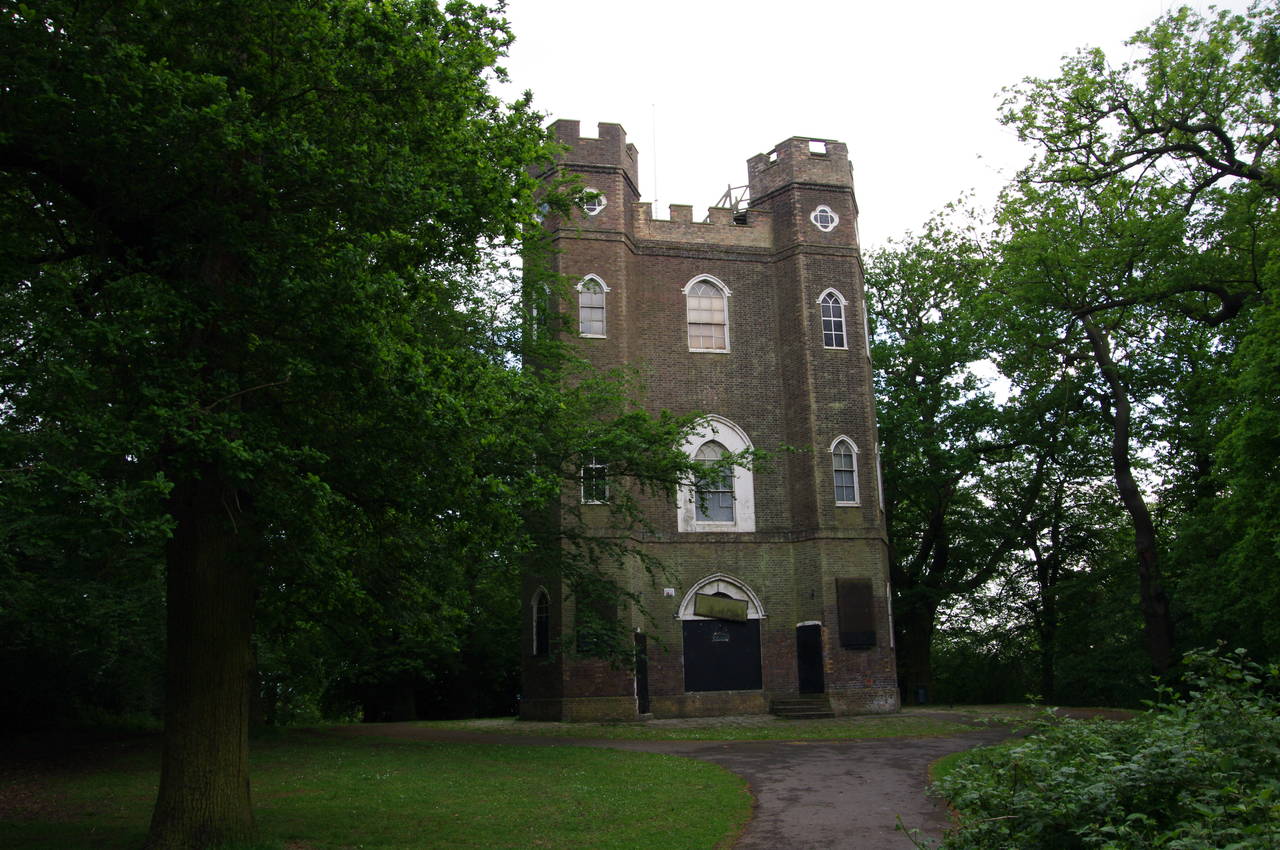
(16) Severndroog Castle
The Capital Ring turns left along the pavement for a short distance to a pedestrian crossing, where the route crosses over, passes between bollards just to the right of the crossing and then bears left along a grassy track onto Woolwich Common (picture 13). In the heart of the Common, the track merges into a narrow tarmac footpath that joins from the left. Soon the path crests a little hill and continues ahead across an open area where there are views ahead towards Shooters Hill (picture 14).
At a crossing of paths on the far side of the open area, the Capital Ring turns right and follows a dirt path alongside a band of trees, soon bearing left at a fork in the path and joining Academy Road, which is followed ahead to a busy intersection with the A207 Shooters Hill.
The route crosses to the opposite corner, following Shooters Hill to the left past a few buildings to the grassy corner of Eltham Common (picture 15). Across the grass, a Capital Ring signpost about 20 metres to the right of the road points into the dense woods that cover most of Eltham Common. The path climbs steadily through the woods to reach a minor road, which is followed to the right for about 200 metres to reach the curious structure of Severndroog Castle (picture 16), just beyond the highest point of the Capital Ring at 128 metres above sea level, one of the highest points in London.
The triangular, Grade II Listed building was built by the widow of Commodore Sir William James as a memorial to her husband after he died in 1783. The name comes from the fortress of Suvarnadurg in India, on which James led a successful attack in 1755. At the time of my visit the castle looked like it had seen better days, with most of the ground floor doors and windows having been boarded up for the previous 25 years. [In July 2013, restoration work began and the building was opened to the public a year later.]

(17) Garden below Severndroog Castle
(18) Garden of Jackwood House
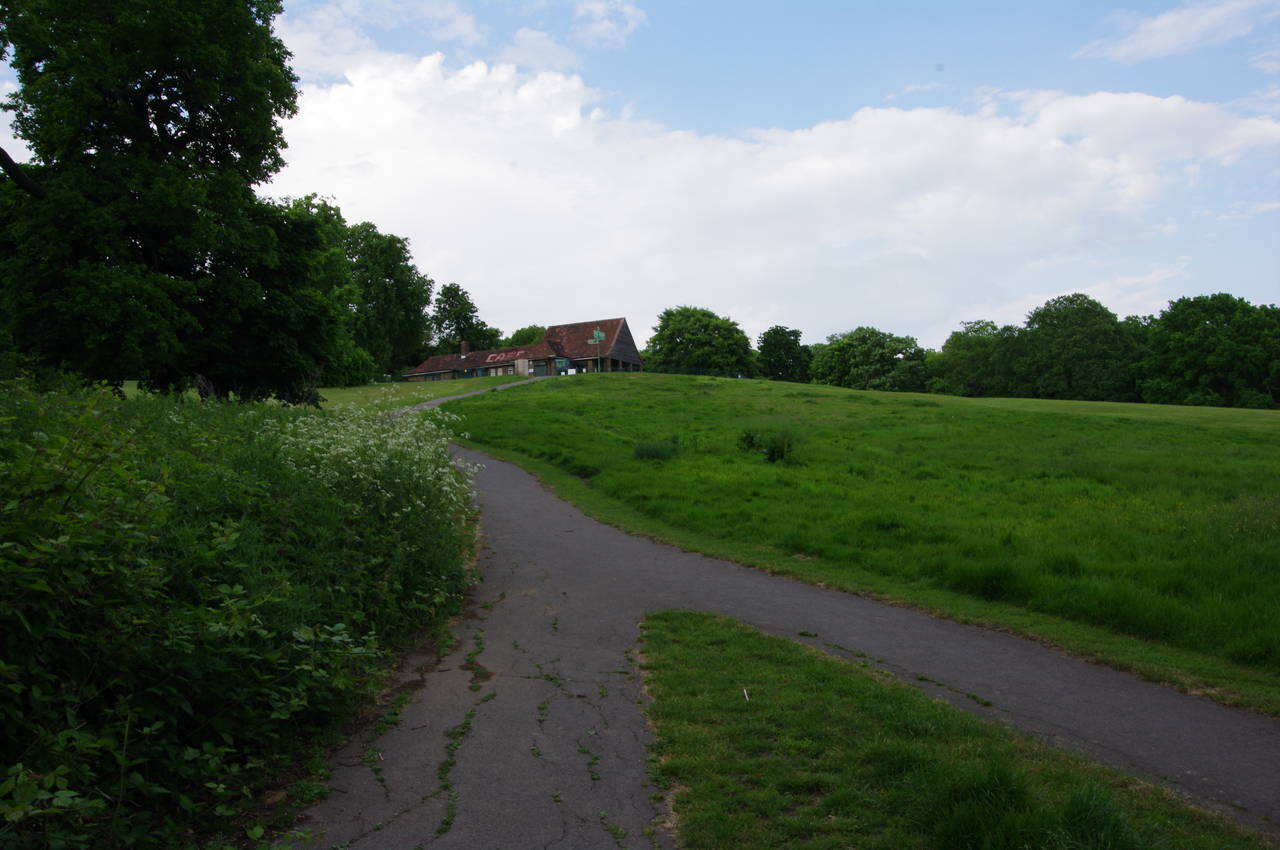
(19) Oxleas Meadows

(20) Oxleas Meadows
Behind the castle, the path heads down a long series of steps through woods to a terrace that was the formal garden of Castlewood House, which stood nearby until the 1920's. There are also good views from here over south-east London and beyond to the North Downs in Kent (picture 17).
The Capital Ring crosses the garden, descends some more steps on the other side and turns left to follow a path through a gap in a stone wall and into Jackwood. A well-signposted path is followed through the northern edge of the wood to a clearing where the route forks left, soon passing by a low brick wall that was part of the garden of Jackwood House (picture 18), another home that disappeared in the 1920's.
Beyond the garden the path heads back into the woods before emerging at Oxleas Meadows, where the path bears left to climb uphill to a café that seemed rather reminiscent of an alpine lodge (picture 19). From the top of the hill there are good views across Oxleas Meadows and a long stretch of the North Downs (picture 20).

(21) Oxleas Wood

(22) Main signpost in Oxleas Wood

(23) Oxleas Wood

(24) Oxleas Wood
From the café, the path continues ahead into Oxleas Wood for about 100 metres before forking right at two successive path junctions. As I headed into the wood, the sun came out for the first time in the afternoon (picture 21). Reaching one of the main signposts for the Capital Ring and Green Chain Walk (picture 22), the route turns right on a broader path (picture 23), almost returning to the edge of Oxleas Meadows before turning left again (picture 24) to continue through the woods to emerge on Welling Way. With the sunlight filtering through the trees, the walk through Oxleas Wood had been a very pleasant and quiet one and I almost forgot that I was walking in a major city.

(25) Shepherdleas Wood

(26) Eltham Park North

(27) Long Pond, Eltham Park North
(28) Eltham Park South
Turning right, the route of the Capital Ring follows Welling Way for a short distance to cross over Rochester Way, then continues ahead on a dirt path into Shepherdleas Wood (picture 25), part of Eltham Park North. The Capital Ring winds its way through the woods on a well-signposted route for about 500 metres before emerging into an open area (picture 26). Briefly following a tarmac path to the left, the route then turns right beside Long Pond (picture 27), which is home to a number of ducks.
Beyond the pond, the tarmac path bends left, soon re-entering the woods with a railway line and the busy A2 hidden from sight through the trees in a cutting to the right. About 150 metres into the trees the Capital Ring turns right to cross over the railway and the road on the wide Falconwood Footbridge and into Eltham Park South.
In contrast to the mostly-wooded northern half of the park, the southern half is much more open and half of it is given over to the Eltham Warren Golf Course. The Capital Ring jinks right then left at the end of the footbridge, following a tarmac path ahead beside a narrow strip of Horse Chestnut trees. The shady path soon bends right to follow the fence line of the golf course (picture 28) all the way across the park, passing tennis courts before reaching Glenesk Road.

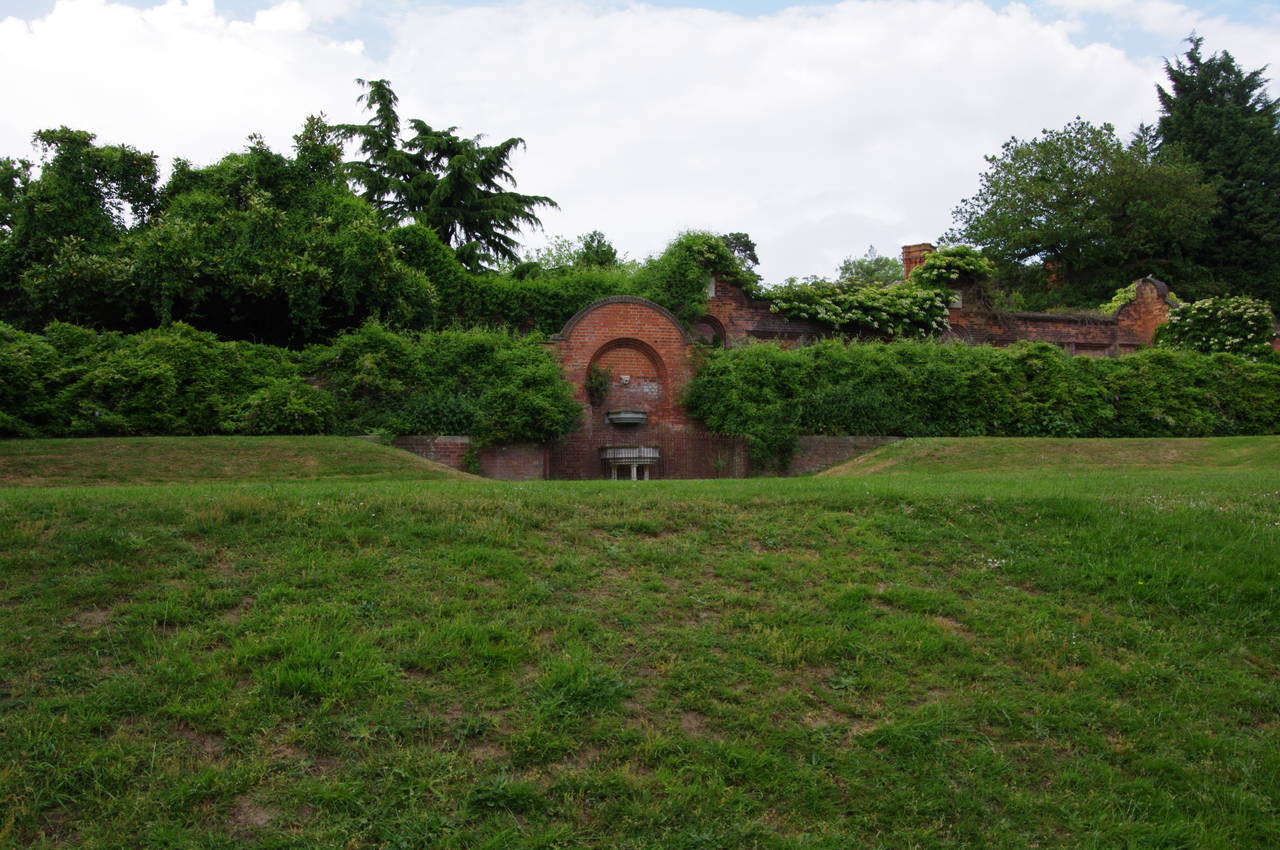
(29) Conduit Head

(30) Holy Trinity Church, Eltham

(31) Eltham Palace

(32) View from King John's Walk
The Capital Ring follows Glenesk Road to the left on the far pavement for around 200 metres to the A210 Bexley Road, crossing and continuing ahead along the narrow Butterfly Lane. Just before a pair of metal gates at the end of the lane, the Capital Ring turns right through trees to a small triangular clearing where a main signpost points half-right through more trees to a second clearing, called Conduit Meadow.
Here stands an odd-looking rough brick structure known as Conduit Head (picture 29). Built around 1509 and now Grade II listed, the building houses two underground water tanks that were used to supply water to Eltham Palace, which is passed a little further along the walk.
Continuing between fences, the path reaches Southend Crescent, turning left past the Victorian-era Holy Trinity Church (picture 30), to reach a small roundabout. The Capital Ring turns sharp right around the roundabout, heading up the left-hand side of Footscray Road. Shortly after a bend in the road, the route turns left along North Park, a quiet residential street that ends about 700 metres later at a roundabout, where the Capital Ring continues ahead across Court Road into Tilt Yard Approach. This name is a reminder of the jousts that were held here in medieval times, when English monarchs lived in Eltham Palace for around 250 years before King Henry VIII moved to Greenwich.
Tilt Yard Approach runs alongside the high brick wall of Eltham Palace to a left turn into Court Yard, which leads down to the main gate, where the road turns right to become King John's Walk. The Palace is open to the public, but had long since closed for the day as I was passing at around eight in the evening. I was able to glimpse the bridge over the moat and one end of the palace through the bars of the gate (picture 31) before continuing on my way.
King John's Walk soon bends left, then left again at a main signpost. The tarmac soon runs out at a barrier, beyond which the path continues on a track that rises between fields. From the crest of the hill there was a good view back over my right shoulder with many of the taller landmarks of central London silhouetted against the evening sky (picture 32), including the Shard, London Eye, St Paul's Cathedral, The Gherkin, and Canary Wharf.
A long, gentle descent takes the path to a crossing over the busy Middle Park Avenue, then ahead to a footbridge over a railway line and a crossing over the even busier A20 Sidcup Road. A tarmac path just to the right of the crossing leads away from the road between a field and houses for about 200 metres to reach Mottingham Lane. Turning right along the far pavement, the Capital Ring follows the lane for 400 metres until a signpost points along a footpath on the left, just as the road bends right.
A rather overgrown path leads between fences then alongside the playing fields of London Marathon Sports Ground and then those of the City of London Polytechnic Sports Ground. Beside the latter, the path is forced to turn left to run beside a narrow concrete channel containing the meagre waters of the infant Quaggy River, passing the sports ground's pavillion and following it's access road to meet Marvels Lane at a main signpost that points to the right.
Here I left the Capital Ring for the day, having covered 15.2km, and walked ahead for another block then right along Chinbrook Road to reach Grove Park railway station in just under ten minutes.